Six Secrets to an Effective, Germ-Defying Move-In Clean

Got the keys to your new house in Toronto? Move-in day is incredibly exciting; the bare walls, high ceilings, and lack of clutter present so many possibilities for designing trendy interiors and a personalized space that’s every inch yours.

Tips for move-in cleaning

That is, until you get to unpacking loads of boxes only to discover that a deep clean might be in order before even setting down the couch and hanging picture frames on the walls.

Moving into a new space calls for a deep move-in clean for a fresh start. More than light dusting and wiping down countertops, you’ll need to scrub away built-up grime and dirt that could have remained after the previous owners moved out — and worse, hardened as you were still packing up your old house.

Whether you’re the proud owners of a new build or a well-loved abode, a deep clean is in order upon move-in. Even better, if you can carve out some time before the big day, a pre-move in clean can greatly ease the transition, since you won’t have to stack boxes and move them around in order to get to every square inch of the place. All you need is an organized system — and maybe some helping hands — to clean as you go from one room to another.

High to Low Cleaning

Ever feel like no matter how much you clean, there’s always a new layer of dust that settles or stubborn grime that won’t go away? That’s because you may not be cleaning as efficiently as you could be.

Think about where you start and how you move around as you clean. For example, while the countertops and floors are easy — and part of the usual routine — to clean, starting with them might not be the best idea. Instead, think of a top-down approach, such as starting with shelving units and overhead lighting fixtures.

You might not realize it, but these hard-to-reach areas are just as prone to grime and dirt build-up, especially that they might not be cleaned routinely. As you clean these areas, dirt will inevitably work its way down, which can be mopped off the floors or wiped down along with surfaces (but we’ll get to that later after the rest of the house — and you’ll see why).

Kitchen Solutions: Start with the Fridge

If you’re moving homes just two blocks over or across Toronto, it’s inevitable to take with you the contents of your fridge. Besides, with all the chaos of moving, do you really have time to step out for groceries, let alone whip up a hearty meal? Even squeezing in the logistics of getting takeout can be challenging on move-in day and even for the next few days as you unpack.

Since raw meat and produce, dairy products, and even leftovers are all perishable, it’s important to store them correctly as soon as you move in. This is why the move-in cleaning of your new kitchen should start with the fridge. Sanitizing the fridge properly ensures clean and safe storage for food — and it’ll take just 20 minutes or less to do.

Start by removing the shelves and drawers for individual cleaning using soap and water. And because it’s hard to avoid lingering smells inside the fridge, whip up a water and vinegar solution for scrubbing down all the surfaces. For stubborn, sticky gunk, let the solution sit and soak for a while.

Next up in the Kitchen

Just as in other rooms, you will want to work your way down to the floors when cleaning the kitchen. Start with the overhead lighting fixtures, ceiling, and shelves. Once the basics are done, it’s time to work on the kitchen fixtures.

Scrub the stovetop and oven using a baking soda and hydrogen peroxide solution for getting rid of stubborn stains, then work your way to the rest of the appliances like the microwave, dishwasher, and coffee-maker. Afterwards, you can clean the sink and countertops, as well as clean the inside of the cupboards and drawers before bringing out the china and silverware.

Whatever you do, though, make sure to save the floors for last, because all the filth and dust unearthed from your move-in clean will definitely end up there. Think of it this way — how many times do you want to mop the floor on such a busy day? The answer is once.

Freshen Up in Spotless Bathrooms

If there’s one place in your house that makes feeling fresh and relaxed possible, it’s the bathroom. Whether it’s a quick touch-up, seven-step skincare routine, or a nice, relaxing bath after a long week, there’s a lot that goes on in the bathroom — and a lot of waste, dirt, and grime that build-up, too.

At the end of a long move-in day, you’ll want — and need — to experience the refreshing and healing powers of a nice shower. But you can’t exactly pamper yourself after a long day of hauling boxes and figuring out where what went if you don’t do a thorough move-in clean of your bathroom.

All you need is dish soap and a sponge for the initial scrub, followed by an antibacterial spray to get rid of germs. If you have extra time and some helping hands, use a bathroom cleaner for a more thorough clean.

Also, if you find that the toilet seats are extra hard to scrub and rid of stains, just replace them. This small investment is the best way to guarantee a clean and safe bathroom for the entire family. Before you go, don’t forget the little and often overlooked parts, such as the light switches, faucets, toilet paper holders, and door handles.

Pay Attention to Fixtures

Once you’ve finished the move-in deep clean of these major areas, it’s time to get the rest of the place ready. Move around and pay attention to often overlooked surfaces like windows and window treatments. Don’t do this when the sun is up, as you will be hard-pressed to see the grime and streaks. Check the closet interiors, tops of doors, door handles, and light switches. Start by dusting using a trusty vacuum attachment, followed by clean, damp rags to wipe down these surfaces.

Save the Floors for Last

We’ve been saying this since the beginning — work your way down from the top, such as the ceiling, tops of shelves, cabinets, lighting fixtures, and yes, the ceiling. All the dirt, grime, and cobwebs gathered from these places will land on the floor, so once you’re done with them, it’s time to finish cleaning up the floors.

Depending on the interior design of your new home, you will find different types of flooring, such as wood, linoleum, or carpeted floors for the main rooms, and tiles in the bathroom. While routine upkeep may vary depending on the material, the good news, a basic move-in clean only requires a trusty vacuum and some light mopping. Just make sure to use a cleaning agent that’s safe — and optimized — for the flooring in your new home.

For carpeted floors, you will want to do a more thorough cleaning with the help of a steam cleaner because although vacuuming makes the carpet appear cleaner, it actually does very little to remove pesky allergens. You wouldn’t want to celebrate move-in day by getting sick, or be welcomed to your dream home by an allergy attack, right?

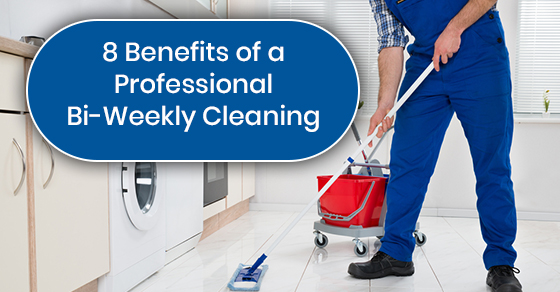
If you don’t own a steam cleaner, don’t fret — that’s what the professionals are for. You can also book a professional pre-move-in deep clean in Toronto to get your new house ready in no time, without adding to the stress of hauling boxes.

Ready for that change of address? Get your new house ready in no time with an effective deep cleaning. Scrub away stubborn dirt and grime, and welcome clean, refreshing energy into your new home.

For more tips and tricks to help with your move-in clean, call Maid4Condos at (647) 822-0601 or contact us here.

8 Benefits of a Professional Bi-Weekly Cleaning

When your life is busy, it can be hard to find time to unwind. Even when you do have some time to relax, if your home is a mess, it can be difficult to let your mind settle when everything around you is screaming, “clean me!”. Having a clean space is important to peace of mind. However, a clean space is also necessary to maintain overall health, as it helps reduce the number of germs and bacteria throughout your home. Although you might feel you can’t afford a professional cleaner, a bi-weekly cleaning offers an affordable way to keep your home well maintained. Here are just some of the benefits of professional bi-weekly cleaning.

Benefits of bi-weekly cleaning

1. Experienced cleaners

Experienced cleaners know how to make the most of their time in your home. When you arrange for bi-weekly cleanings, you can keep your home tidy because the cleaners will provide professional expertise using all of their trade secrets and techniques to keep your home clean. They have the right equipment and products to handle each job, so the work is done efficiently and properly for the best possible results.

2. Cleanings are scheduled

Obviously, bi-weekly cleanings mean you will have scheduled cleanings. However, the benefit to having a cleaning schedule is that you don’t have to worry about trying to arrange cleanings on the fly. Instead, you will know the day and time your cleaners will arrive and make the necessary arrangements to let them in.

3. More down time

Busy people tend to find a lot of their down time doing things they don’t enjoy. This can include laundry, yard work, grocery shopping, and cleaning. When you have bi-weekly professional cleanings scheduled, you know your down time will be more enjoyable. You can have fun, guilt-free, knowing your home is clean. Cleaning your home takes tons of time, so if you do decide to do some cleanup between your professional cleanings, it will take less time since, for the most part, your cleaners are keeping things manageable.

4. Consistency

You can make arrangements with professional cleaners to stick to a list of tasks they tend to at each appointment. They will be using the same cleaning products, going through the motions required to maintain a clean home, and you can depend on their regular arrival. If you want, you can also alternate their schedule so they can cover a longer list of tasks. When you clean on your own, you tend to deal with the things you can based on how much time you have. This means tasks such as dusting, cleaning floors, or a thorough kitchen or bathroom scrub might get missed. Over time, this makes it far harder to clean buildup.

5. Cleaning supplies are included

Although you have to pay for cleaning services, everything they do is included. You will save money on cleaning supplies, as they will bring everything they need. Your cleaners will use top quality products to clean your home, as it makes their job easier. They will also use the right tools and cleaning products for each job to get the best possible results. Especially in the case of bi-weekly cleanings, the cleaner they leave your home, the easier their job is the next time around. You can even request eco-friendly products if you prefer. The products they use will not only clean, but also disinfectant to keep your surfaces sterile and germ-free.

6. Customize your plan

Most cleaning companies offer packages to make it easier to afford the service, while also covering the most common cleaning jobs families require. However, different homes have different needs. For example, you might prefer to make your own bed and pick up your own dirty clothes, while other families might want this added to the list. You might not have a staircase to be dusted, while another family will. You can discuss your needs with your cleaning company to make sure your particular cleaning needs are met. You provide a checklist and they complete the work.

7. Teach your kids cleaning habits

Although it might seem having cleaners is not the best way to teach your kids cleaning habits, it shows them the importance of keeping the home neat and tidy. Bi-weekly cleanings keep things more manageable for you in between cleanings, and you can make sure the kids help out with the cleaning duties when the cleaners are not scheduled. This includes daily things such as doing the dishes, making their beds, cleaning up their toys, and even setting and clearing the table.

8. A clean home!

A clean home is by far the best thing about having bi-weekly cleanings. You can come home without the worry of finding a mess. You will know your home is germ-free and when someone drops by unexpectedly, you won’t be embarrassed to ask them in for tea.

Although some people feel guilty about hiring professional cleaners, bi-weekly cleanings simply provide you with assistance to maintain your home. However, you can still continue to contribute to the cleanings, so there is no need to feel guilty. As well, you work hard and cleaners are there to do a job as well. They appreciate the work and take pride in what they do, which is helping families maintain a clean home.

If you would like to schedule our cleaning team at Maid4Condos to set up a bi-weekly cleaning schedule, then click here.

Seven Things to Clean Before Winter

Why is it that everyone is more than happy to jump on the spring-cleaning express as a given in their cleaning regimes, but no plans are ever made for the rest of the seasons? Once summer winds down and winter is on its way, you should plan a good fall cleaning. The end of the seasons should always be viewed as an opportunity to do a thorough cleaning. It is the time to reorganize, declutter, and remove all signs of the dirt and accumulation of seasons past. You can nail your fall cleaning projects down using this handy list of things you need to clean before winter arrives.

Tips for winter cleaning

1. Stove and oven

The winter months call for more roasts, baking, casseroles, and comfort foods that require oven use. You might have been grilling meat all summer long and not given much thought to your oven. Now is the time to give it a thorough cleaning to avoid the smell and smoke of baked-on messes when you pop that lasagna in the oven. Just think Thanksgiving turkey and you’ll be looking forward to those home-baked winter meals. While you’re at it, you might as well give your stovetop a good cleaning as well. If you have electric burners, remove them and clean out the trays. Last but not least, take a look at your stove fan and replace or wash the filter. Grease buildup can get pretty gross up there!

2. Register vents

If you don’t have air conditioning and your vents have gone unused all summer long, you’ll want to take a look at your heating registers. These can get pretty dusty, which can actually affect your energy bills. You should remove the vents and give them a good washing, while also making sure they are working properly. Cracks, warping, and breaks can block heat from coming into your rooms properly. Make sure you allow the registers to dry before putting them back in place.

3. Carpets and area rugs

Carpets can hold a lot of dirt, not to mention allergens and dust mites. In the winter when more illnesses are going around, breathing in this dirt can weaken your immune system. ‌ ‌Deep professional cleaning for your carpets is a must when winter is just around the corner. You can also arrange to send out your area rugs for a professional cleaning. Your home will be looking even better when the holiday entertaining season arrives.

4. Ceiling fans

These babies probably got a good workout all summer long. They will be covered in dust, so a good cleaning is in order. First, wipe down the blades to remove all the dust and grease that might have built up. Then, as an added tip, reverse the settings for your fan and use them when the heat is on to help force the warm air that rises downwards. This keeps things toasty warm and allows you to save energy. Don’t forget to wash the lamp covers too, as this will keep them burning brighter during the shorter days of winter.

5. Eliminate clutter

Considering that you’ll be spending a lot more time indoors this winter, you’ll want your home to be cozy, not messy. You can do a fall decluttering to help get organized for the winter. Not only can you eliminate clutter, but also store away all your summer paraphernalia. From bike helmets in the hall, to all those extra flip flops and sandals in the closet, to the beach toys in the kids’ rooms, to the outdoor dinnerware in the kitchen, you can make room for winter by getting everything organized and stored. This is also the perfect time to switch out your summer clothes for your winter wear. Once all of this is done, do a thorough wipedown to remove dust from door trims, baseboards, floors, and other surfaces.

6. Disinfect garbage cans and wastebaskets

Your garbage cans, especially in the kitchen and bathroom, are harbingers of germs. During the summer months, germs like to build thanks to the warmer, damp, humid weather. You should take this time to do a very heavy-duty cleaning of your garbage cans, recycling bins, and wastebaskets. This will reduce germs and provide a fresh start for the winter.

This is no easy task. Your kitchen bins need to be hosed down and disinfected using a good strong cleaner or vinegar. You can use an environmentally friendly cleaner as a disinfectant with undiluted hydrogen peroxide, or vinegar mixed 50/50 with water. Use only one or the other because when hydrogen peroxide is mixed with vinegar, it can be very harmful to your eyes, skin, and lungs!

If you can’t use a hose, leave the disinfectant in the cans for an hour, before dumping the water and scrubbing it with a brush. This will get rid of any coated-on mess. If possible, allow the bins to dry in the sun, as it acts as a natural bacteria killer.

7. Winterize your entry/foyer

Get ready for the wet mess of slush and snow by winterizing your entryway or foyer. You’ll need a nice waterproof boot tray to store those slushy boots and other wet items. You can also add some extra hooks or storage, such as a bench for all of your winter mitts, hats, and scarves. A little outdoor mat comes in handy as well, so you track less wet mess into your home. You can also add a waterproof area rug if space allows.

Although many of these projects are the same as those you might tackle in the spring, keep in mind that you probably haven’t tackled them all summer long! These tips will have your home winter ready in no time.

If you would like to hire our cleaning team at Maid4Condos for a winter prep cleaning, then click here.

7 Reasons to do a Post-Summer Deep Clean

As summer winds down, the days get shorter, the breezes get chillier, and it won’t be long before the fall has arrived. We all love the summer, but it brings its own list of challenges when it comes to keeping your home or condo clean. When the kids head back to school (whether you’ve got some of your own or not), it can be your cue to get started on your post-summer deep clean. We all ramp up our cleaning with the arrival of spring; however, the fall is often ignored. The summer months can not only track in a lot more dirt into your home but also provide a new list of cleaning tasks often best left to the professionals. Here are seven reasons you need to do a post-summer deep cleaning in the fall.

Benefits of post-summer deep clean

1. Outdoor furniture should be cleaned and stored

If you have a balcony, patio, or backyard with patio furniture, you’ll need to prepare your furniture for storage. Even if you keep these items outside, they’ll need a thorough wipe down and should be covered to protect them from the harsh winter to come. A deep clean will remove remnants of barbecues, spilled drinks, and dirt buildup that can eat away at the finish of your furniture. You should then either bring them inside if storage space allows or protect them with tarps or furniture covers, so they are ready to use when summer returns. This makes your spring setup easier as well!

2. Summer brings more dust and debris indoors

Unless it is sweltering outside, we tend to open our windows and patio doors more often in the summer. It’s always nice to let in some fresh air when you can. However, open windows also mean more dirt and pollutants can be brought into your home, including pesky allergy-causing pollen. Some people might open their patio doors when going outside. However, it still means you are opening your doors more often, allowing more dirt to come indoors. For this reason, you want to do a thorough vacuuming of furniture and dusting of all the other surfaces in your home. Otherwise, all of this dirt will be trapped in your home all winter long.

A deep cleaning will address dust buildup in hard-to-reach places like the ceilings, baseboards, behind the TVs, etc. You will breathe easier knowing all of the dust and allergens have been removed.

3. More tracked-in dirt

Trips to the beach, biking, camping, and hiking all tend to keep you more active in the great outdoors in the summer. This means you are tracking in more dirt on your shoes, clothes, and pets! Even if you are pretty good at regular vacuuming, this additional dirt tends to hang around without a thorough cleaning. The debris and dirt can stick to your furniture, get caught in your carpeting, and continue to be tracked through your home from your doormats. A thorough cleaning will reduce the debris so you are not tracking it from room to room all winter long.

4. Summer decluttering

Summer tends to come with a lot more “stuff.” This can include plastic dinnerware for eating outside, swimming and beach toys, garden tools, sunhats and towels, etc. All of this stuff can create clutter in your home. You should look at all of the stuff you can store for the winter to reduce the mess factor in your home. This also makes more room for all those winter items like boots, shovels, and boot trays.

A professional house cleaning will keep your home looking neater, so you don’t feel too shut in when the cold weather arrives. Things will be organized so you can hunker in for the duration of winter feeling safe, clean, and cozy instead of claustrophobic. This can help to keep the winter blues at bay.

5. Your home gets shut up in the winter

Once you are back to winter living, you’ll remember what it’s like to be in a sealed environment. When the temperatures drop, you’ll appreciate having a dust-free, cleaner environment. Most people keep their windows shut tight in the winter, which means you’ll be breathing in the stale air that summer left behind. Knowing you’ve done everything you can to keep things dust-free and clean will make it less stuffy!

6. Winter linens and pillowcases

The winter calls for warmer bed linens. You can have your bed stripped, mattress vacuumed, and all of your summer bed linens cleaned and stored for the spring. You can then bring out all of your flannel and warmer comforters so you are ready to snuggle up in the fall.

7. Pack away summer clothes

Having someone to help wash, fold, sort, and store your summer clothes is a blessing. This takes a lot of time and effort. Getting everything organized is even more important if you live in a smaller space with limited storage. You can create a storage plan that allows you to swap out your seasonal clothes, so you have one place for the current season, and another place for the clothes you no longer need. Then, you can just reverse everything with the change of the seasons to save time and effort.

Although it is always hard to say goodbye to the lazy, hazy days of summer, it is the perfect time to arrange for a deep, professional cleaning. These are just some of the reasons you should arrange for a deep, summer wind down clean up. You will rid your home of all that additional dust, debris, and pollen in order to get more organized and be prepared for the colder weather.

If you would like to hire our cleaning team at Maid4Condos for a post-summer cleaning, then click here.

14 Benefits of Using Natural Cleaning Products

The cleaning products you use in your home leave behind residue that can come into contact with your skin, not to mention the food you prepare, the clothes you wear, and even your pets. Whether you clean your home yourself or use a maid service, you should always consider the cleaning products used. Most over-the-counter household cleaners contain harmful chemicals. Using eco-friendly cleaners will keep your home free of dangerous chemicals for a healthier environment. Your health, the health of your family, and your pets will all be protected from exposure to many of the toxins commonly found at home.

Here are 14 benefits of using natural cleaning products:

Benefits of using natural cleaning products

1. They are available in many varieties

Eco-friendly cleaning products have grown in demand and so to have the number of options available on the market today. They can compete with the other cleaning products, offering the same cleaning power without the chemicals. They offer natural alternatives that can handle the same cleaning jobs without causing health or environmental issues.

2. They won’t harm the environment

When you choose eco-friendly cleaning products, you are choosing to protect the environment. You can perform common household cleaning tasks, such as washing the dishes, knowing your dishes will be clean without the use of dangerous chemicals. Every time you wash your dishes, you drain chemicals into the environment. Other products that do this include car washing products and cleaning products for your outdoor furniture.

3. Protect your circulatory system

Chemical dish soap, detergent, and household cleaners can all penetrate your skin. This is your largest organ, which means it can quickly absorb dangerous chemicals that can affect bodily functions and your overall health. Choosing eco-friendly cleaning products protects you from exposure to dangerous chemicals.

4. Skin-friendly

As mentioned above, when cleaning and also after cleaning, your skin can be exposed to the chemicals in cleaning products. Although you can choose to use gloves, eco-friendly cleaning products are less harsh on your skin. They use eco-friendly ingredients such as glycerine. It has the same cleaning power to cut grease but also has skin-softening properties. You can have clean dishes, counters and soft hands to boot.

5. Allergy-free

Eco-friendly cleaning products are hypo-allergenic, making them safe for family members with allergies. This is especially important for laundry detergents. People with allergies should always use eco-friendly cleaning detergents that are free from dyes and fragrances. This will reduce the risk of skin allergies and irritations.

6. No animal testing

Eco-friendly cleaning products are not only free of harsh chemicals but also not tested on animals! This allows you to clean guilt-free, knowing your four-legged friends were not harmed in the making of your cleaning products.

7. No impact on the environment

The more people who choose eco-friendly cleaning products, the less impact cleaning has on the environment. You can help contribute to the improvement of air and water quality. This can reduce the number of health issues worldwide, including a reduced risk for cancer.

8. Benefit the earth

You can reduce the negative impact on the environment, including water pollution, ozone depletion, air pollution, and global climate change. You will also promote recycling, as eco-friendly cleaning products companies practice recycling habits, focus on the reduction of toxic products, and reduce excess use of water and raw materials.

9. Reduce costs

Many people view eco-friendly cleaning products as being more expensive. However, you often can use less of the product to get the results you desire. They have also become more competitive in pricing as demand has become more widespread. Many products you have in your pantry can be used to reduce the cost of cleaning products, including vinegar, baking soda, and lemons.

10. Eliminate indoor pollution

You’ve probably heard about the dangers of toxic pollution indoors. Your home has many toxins in the air from a combination of cleaning products, trapped air, allergens, germs, bacteria, and even toxins produced from the decorative materials in your home. By using eco-friendly cleaning alternatives, you can help reduce toxic chemicals and waste indoors.

11. Pleasant scents

Natural cleaning products have a more pleasant scent, especially when compared to the harsh chemical odours from most cleaners. Even natural vinegar products have scents that dissipate quickly, unlike chemicals that can leave a lingering chemical smell in your home. In fact, many eco-friendly products use natural essential oils for fragrances. This provides an added benefit of aromatherapy that can soothe nerves and give a sense of calm and relaxation.

12. Respiratory benefits

Breathing in the residue left behind from spray cleaners can increase the risk of asthma. As well, if you have allergies or asthma, chemicals can aggravate your respiratory issues. Asthma is one of the most common chronic illnesses and is also a leading cause of school absences. Using eco-friendly cleaners will reduce the amount of chemicals released in your home, so less harmful chemicals are inhaled.

13. Using fewer antibacterial products

According to the U.S. Food and Drug Administration (FDA), washing with antibacterial soaps isn’t any better than regular soaps. The American Medical Association (AMA) found that the overuse of antibacterials can actually promote bacterial resistance. This includes reducing the effectiveness of antibiotics. Other antibacterials, such as triclosan, can lead to issues with your hormonal system and thyroid. You don’t have to worry about such issues with natural cleaning products.

14. Ingredients you know

Last but not least, when you choose eco-friendly cleaning products, you’ll recognize the names of the ingredients on the list. You can even make your own cleaning products, so you always know exactly what is being used.

As you can see, eco-friendly cleaners provide you with a safe alternative to keep your home sparkling clean. Your family, your pets, and the environment will thank you. You will also feel guilt-free knowing that the choices you make are not impacting animals, the planet, or your health!

If you would like to hire our eco-friendly cleaning team at Maid4Condos, then click here.

Common Household Cleaning Products that Should Never Be Used Together

Doing your household cleaning is something you don’t give much thought to. You have the tools and products to get certain jobs done, and clean away merrily looking forward to finishing the work. However, believe it or not, those common products you are using can create lethal combinations if you aren’t careful. Unless you had a strong desire to be a pharmacist as a teen, chances are you didn’t pay much attention in chemistry class. All the cleaning products you use contain safe combinations of chemicals. When you start experimenting to create your own combination, you could be creating a formula for disaster. With this in mind, we have put together a list of serious warnings for the products you should never use together!

Common Household Cleaning Products that Should Never Be Used Together

1. Bleach and vinegar

Both of these are such common products in most households. However, when these two things are combined, they create toxic chlorine gas. Used individually, they make excellent disinfectants, but together they actually burn your lungs and eyes simply by breathing in the toxic vapour they produce. Luckily, chlorine gas can be recognized by its pungent smell, which will act as a warning before the irritating odour can cause damage. If you doubt its potency, chlorine gas was used as a weapon in World War I.

2. Ammonia and bleach

Once again, bleach can be a culprit, this time when combined with ammonia. This combination creates toxic chloramine vapours. And it doesn’t just have to be straight up ammonia and bleach. Any products containing these ingredients can produce the same toxic vapours. Always read the labels of products before you try to create your own super cleaner. Beware of some forms of Windex that contain ammonia and products like Drano, which often contain bleach. If you aren’t careful, the results can be throat burns and respiratory damage. In fact, you could actually produce explosive liquid hydrazine! Proceed with caution.

3. Rubbing alcohol and bleach

A pattern seems to be forming with that potent bleach. In this case, the combination creates chloroform. We won’t get into the chemistry compounds that can lead to issues; just be safe in knowing you can suffer serious damage to your nervous system, eyes, lungs, skin, liver, and kidneys. Low levels can cause dizziness and nausea, while extreme levels can even result in death.

4. Hydrogen peroxide and vinegar

This combination creates peracetic acid, which is highly corrosive. This might explain why people are combining them for cleaning in the first place. However, the result will be highly corrosive and very irritating to the eyes, skin, throat, nose, and lungs.

5. Any two or more drain cleaners

Because you won’t know what is contained in each product, you can end up producing just about any of the toxic substances mentioned above. The major danger lies in the possibility of creating chlorine gas, which is not only bad when breathed in, but can also cause an explosion.

6. Mildew stain remover and bleach

This is another combination that can produce chlorine gas. As mentioned, it can be dangerous due to the risk of explosions while also causing irritation of the eyes, nose, throat, and lungs.

7. Bleach and toilet bowl cleaner

This combination will release toxic fumes leading to breathing issues and eye irritation.

8. Oven cleaner and bleach

This is yet another combination that will produce that troublesome, dangerous chlorine gas.

9. Dish detergent and bleach

This one might seem harmless, but there are dish detergents that contain ammonia. When combined with bleach, you will produce harmful toxic gas.

As you can see, bleach seems to pop up often on the list. It is best to stick to bleach use on its own to avoid issues. Some other basic safety rules include:

  • Never mix two different cleaning products together.
  • Try to stick to one drain cleaner in case there is residue left in the drain that might cause a reaction.

10. Bleach and lemon juice

What? You would think that something natural like lemon juice should be safe to use even when combined with bleach. Unfortunately, this combination can also create, you guessed it, chlorine gas.

11. Certain pesticides and water

Avoid watering down pesticides you use to rid yourself of bugs in the house. When combined with water, some pesticides will create deadly phosphine gas.

Combinations that Don’t Work

We’ve covered the products that could prove dangerous, but there are also some combinations that will result in producing a less effective cleaning solution. That means extra work for nothing. Here are the lazy cleaning combinations to avoid:

  • Antibacterials/Disinfectants and Detergent: This combination actually neutralizes the disinfectant properties in your cleaners, something you want to avoid, especially in the germ-filled bathroom.
  • Vinegar and Water (on Hardwood Floors): This is not only useless, but will also ruin your hardwood floors. You can dull the appearance of your floors and cause damage that will be very expensive to repair.
  • Castile Soap and Vinegar: These are two eco-friendly cleaners that, when combined, will create a horrifying curdled mess that you’ll have to clean up.

Although it can be tempting to create your own super powerful cleaning products, it is best to leave the chemistry to the experts. These tips will help you avoid serious health issues or explosive disasters. You will also avoid creating ineffective cleaners that will cause more harm than good.

If you want to play it safe, the cleaning team at Maid4Condos will clean your home safely using the right product to get the job done right. Click here to schedule your cleaning today!

Top 14 Items Around Your Home That You Forget to Clean

Cleaning is one of those things most of us do reluctantly. We know it has to be done, but it takes up a lot more time than we have to spare. We all have a go-to cleaning list that covers off the basics. Some of us might be neat freaks and go that extra mile. However, for the most part, we tend to clean the usual spots and ignore a lot of places we don’t look at too closely. For a thorough clean, you can start considering a few of the most common spots people tend to overlook. Here are 14 spots we bet you have forgotten to clean more than once:

Top 14 Items Around Your Home That You Forget to Clean

1. Stained mugs and cups: If you’re an obsessive coffee drinker, your mugs and cups tend to get a dark discolouration from the rich deep brown of your favourite hot beverage. And tea lovers aren’t off the hook either. You can keep your mugs looking their best with a little vinegar and baking soda. This natural scrubbing combo will remove the stubborn coffee and tea stains your dishwasher or hand washing won’t touch.

2. Your pod coffee maker: If you use a pod coffee maker that gets a pretty good workout every day, you should make an effort to clean it at least once a month with these easy steps:

  • Unplug the machine.
  • Remove the washable parts and wash them in warm water.
  • Wipe down your machine with a clean cloth.
  • Replace the washed parts and plug your machine back in.
  • Fill the reservoir with water and a dash of vinegar, and start the brew cycle to empty into a mug. Discard the water and keep running it until it is emptied out.
  • Leave the Keurig on for four hours to allow the residual vinegar to continue cleaning.
  • Fill the reservoir with water and continue to run the brew cycle until all the water is discarded.

3. Patio umbrellas: Before putting your patio umbrella away for the winter, give it a thorough scrub with water and baking soda to remove moisture and mildew. Make sure it is completely dry before sealing it up. It will also keep bugs from nesting there when your umbrella is stored.

4. Bath mats: Throw your bath mat in with your dirty towels every week to avoid mildew and unpleasant smells.

5. Your iron: This might seem like an odd one, but your iron can collect gunk when the heat comes into contact with certain fabrics. The next time you heat up your iron for use, that gunk will melt and spread on your clothes. You can use a mixture of baking soda and vinegar to scrub away gunk and avoid ruining your shirts.

6. Storage baskets: The storage baskets you use throughout your home can collect all kinds of stuff. From onion skins in the kitchen to rock salt on your boot trays, you can keep these containers clean with a quick vacuum. You can also opt to dump them out every once in a while.

7. Your reusable shopping bags: Hopefully, you are doing the environment a solid by using reusable bags for your groceries. First, an added tip for health: always use different bags for raw meat. Second, because your groceries can leave contaminants behind, you should clean them with an antibacterial wipe after use, especially if you know there’s been a spill.

8. Dusty lamps and shades: These household items are like magnets for dust. You can wipe them down with a duster when you’re making your weekly pass over your other furniture. But you should also use your soft attachment on your vacuum to suction off that dusty shade buildup inside and out.

9. Faucet gunk: Gunk can really build up behind your faucets. You should always make sure you are giving the area around your faucets a good scrub with a toothbrush, say, once a month or so. This will get rid of that questionable germy, scummy soap and toothpaste grunge that can build up in the bathroom and all likes of horrifying gunk that can appear in your kitchen.

10. Vent hood: Your vent hood is the collector all things greasy and grimy. It can be a hard thing to tackle, but it can be done. You can remove the filters and soak them in warm soapy water, then thoroughly dry them before putting them back. The hood itself will require hot soapy water and a sponge with an abrasive, but non-scratching back. This will help you get that sticky buildup removed.

11. Heat and AC vents: You can dip your vacuum into the upper area of your air vents to reduce the dust and other things that might collect there over the weeks.

12. Blinds and shutters: These are big dust collectors, especially shutters. A handy dust mop can be run over the slats, but sometimes this can leave buildup in the corners. Instead, use a damp cloth to remove dust once every month or so. For blinds, they can be lifted out of their holder and then wiped down thoroughly with a sponge and soapy water. This is important for blinds in the kitchen, as they can get a sticky buildup of grease.

13. Your toaster and toaster oven: Most toasters and toaster ovens have a slide-out tray you can remove and clean. You can also unplug your toaster and then hold it over the sink to shake out the excess crumbs. If you don’t, you might get mini-fires flaring up when the crumbs heat up.

14. Your garbage bins: Kitchen bins are disgusting. To avoid gagging every time you toss something into the garbage, you should literally hose down your bins at least once a month. Dirty bins can attract vermin, so keeping them clean is important. You can also pay attention if you make a spill; just wipe it right away to avoid the buildup. You can also fill the bin with hot soapy water and let it sit for a while, and then dump the water out. An added tip: Place a fresh-scented dryer cloth in the bottom of your bins to reduce odours.

These tips will help keep your home extra clean. If you don’t have the time, the cleaning team at Maid4Condos has your back. Click here to schedule your cleaning today!

Five Surprising Places Where Germs Lurk in Your Kitchen

The funny thing about germs is that they are invisible. You can look around your home and not spot a single sign of dirt, but germs, well they are different. Even when your kitchen looks spic and span clean, germs are lurking where you least expect to find them. Knowing where to look will help you keep ahead of their bacteria-spreading plans so you can avoid common ailments like food poisoning. Here are five surprising places where germs can be found according to the National Sanitation Foundation.

Five Surprising Places Where Germs Lurk in Your Kitchen

1. Your fridge vegetable crisper

How many times have you reached into your vegetable crisper to find a soggy bag of something rotten? Because fruits and vegetables are so perishable, it is easy to over purchase and leave something tucked under everything else where it can start to go bad. This is just one of the reasons your crisper drawers are fodder for germs. Another reason is that bacteria such as Salmonella and Listeria can trickle down from meat stored above. Your drawers are also a good place for yeast and mold to hang out.

Cleaning Tip: To help keep crisper drawer germs at bay, make it a point to wash them out at least once a week using warm soapy water. You can also wipe them down with a microfiber cloth every day to keep them extra clean.

2. Your fridge meat bins

Another drawer and another spot for germs. If you think fruit and vegetables are bad, meat is even worse. Meat can bring bacteria into your kitchen just about anywhere, including your cold fridge and freezer. It is nice to think that cold temperatures will kill germs, but unfortunately this is not the case. Raw meat and lunch meats can both leak juices that can contain Salmonella and E. coli. Your meat drawers can also harbour yeast and mold.

Cleaning Tip: Just as we suggested for your crisper drawers, you can reduce germs in your meat bins with a thorough cleaning. Here, you might want to be even more diligent with more frequent cleanings. You should also always store cooked meats and raw meats in separate drawers to avoid the risk of cross-contamination. If you don’t have a fridge that allows for this, consider keeping your deli and cooked meats in a sealed container.

3. Your blender parts and can openers

Small appliances are handy kitchen tools, but they are real culprits when it comes to germs. When it comes to your blender and can opener, they have some tight little spaces ideal for germs. And it’s not just electric can openers. Your hand-held openers are just as likely to collect germs as your electric openers. In fact, hand-helds can be even worse, as you tend to use them and then toss them back in the drawer with your washed utensils. All of these kitchen tools can carry germs, including the usual suspects like Salmonella, E. coli, yeast, and mold.

Cleaning Tip: To keep on top of the germs, always make sure you take apart your blender and wash every piece just like you do for your dishes. Make sure you are using warm soapy water. You should also wipe down your electric can opener after use with an antibacterial wipe, paying close attention to the area that attaches and opens the can. Your hand-held opener can be tossed in with the dishes, including the dishwasher if you’re lucky enough to have one. All of these items should also be thoroughly dried to avoid damage.

4. Your rubber and wood-handled spatulas

This might seem like an odd one for the list, but these rubber tools are the perfect surface for germs including E. coli, yeast, and mold. This is often because they have two parts where germs can hide. Even when cleaned, they can still be hiding germs.

Cleaning Tip: To be safe, always take them apart before you try to clean them. This way you will get into all the nooks and crannies. A dishwasher is perfect if they are dishwasher safe because it will give them a good blast of germ-killing heat. Spatulas with wooden handles will have to be washed with warm soapy water by hand.

5. Your rubber-sealed food storage containers

Any kitchen worth its weight in gold will have a good selection of glass or plastic storage containers with rubber seals. This is a must if you want to keep food locked and loaded for freshness. However, they are also the perfect place for germs to hide. Underneath those air-tight seals, there can be all kinds of germs including Salmonella, yeast, and mold. This is because they tend to have a lot of crevices that might be hard to reach even when they are tossed into the dishwasher.

Cleaning Tip: To get to those sneaky germs, rubber-sealed food storage lids should be soaked in hot soapy water before washing by hand. If you have a dishwasher and your containers are dishwasher safe, you can also give them a quick rinse before putting them through the cycle. The seals are the main area where germs can hide, so if need be, consider using something to get into those crevices (such as a toothpick) so you can get anything that’s stuck under the rim.

Food Poisoning Symptoms

If you don’t think it’s worth all the effort, consider the symptoms of food poisoning:

  • Nausea
  • Vomiting
  • Watery or bloody diarrhea
  • Abdominal pain and cramps
  • Fever

You can live with these symptoms for a few hours or a few days. If you have kids, you know you don’t want to be dealing with the clean up from food poisoning!

Although you will never get at all those microorganisms living in your kitchen, a thorough cleaning can help reduce the odds of getting sick. The cleaning team at Maid4Condos has your back. Click here to schedule your cleaning today!

Your Complete Guide to Washing Pillows for the Best Sleep You’ve Had in Years

Long day at work? There’s nothing more rewarding than coming home to fresh sheets and diving into plush pillows. A lot of us change our sheets on the regular and even air out the mattress or spray some much-needed air freshener, but when was the last time you washed your pillows? That’s right, your pillows need some TLC, too, and that means throwing them in the washer for a thorough cleaning and fluffing. While keeping up with a regularly scheduled cleaning schedule is always a good idea, you’ll want to throw your pillows into your cleaning routine every now and then.

Your Complete Guide to Washing Pillows for the Best Sleep You've Had in Years

Guilty of skipping out on washing your pillows? It’s not too late to give them a much-needed clean — and getting a much better good night’s sleep. Learn how to clean your pillows here:

Why You Need to Wash Your Pillows

You might not realize it, but your favourite silk pillowcase and matching sheets set don’t really do a complete job of shielding your pillows and mattress from the everyday grime and day-to-day grit you bring home. That’s why some people opt for an extra layer of protection that a protective pillowcase gives, but even then, body oils, bacteria, saliva, and dust mites can still make their way through the fabric. And without a protective sheet, it’s much worse — the standard cotton used in regular pillows is easily permeable, rendering your skin unprotected from everyday grime and bacteria nesting in the fabric.

But that’s not all; over time, regular exposure to contaminants and free radicals taking up residence on your own bed can cause allergy flare-ups, or worse, diseases. You might not have experienced a reaction by now, but a telltale sign of this contaminant buildup is the increasing weight of your pillow as it absorbs bacteria, allergens, dead skin cells, dust, and even mould.

How often do I need to wash my pillows?

One of the most basic questions that people ask is, how often do pillows need to be washed? The quick answer is twice a year — which isn’t a lot at all — but it still comes down to your sleeping habits.

The twice-a-year rule is good to follow when you use a zippered pillow protector, although bear in mind that the protectors themselves need to be thrown into the laundry once a month. On the other hand, it’s a little different if your nighttime routine involves a lot more than getting in the shower and diving into bed after a long day.

For instance, if you’re a fan of face creams, lotions, and multi-step skincare routines, you’ll need to wash your pillows more than twice a year. The same goes if you’re prone to oily skin and scalp. Frequent washing of pillows keeps them clean and fresh for longer as it eliminates contaminants, grime, dead skin cells, and even the buildup of sheen from your skincare products.

Plus — and there’s really nothing to be ashamed of here — if you’re prone to drooling in your sleep, or if you notice that your pillow looks or smells musty, it’s a clear sign that you need to wash your pillow more often. Finally, if you’re not a fan of pillow protectors at all, it’s best to wash your pillows once a month or every other month.

A Guide to Washing Pillows

Throwing your pillows in the laundry might sound pretty straightforward but to make sure that they retain their natural fluff it’s important to know what you’re dealing with. While most pillows are machine washable, pillows designed with certain types of filling, such as memory foam, are not.

For pillows with feather down and synthetic fillings, make sure to wash them in warm water that’s safe for the material, as indicated in the care tag. Don’t put more than two pillows per load to avoid overcrowding the machine and allow it to remain balanced when spinning. As for the detergent, use a mild liquid one instead of a residue-inducing powder. Finally, make sure that the machine is set on a gentle cycle. An extra rinse cycle might also be in order to get rid of all the soap suds.

How to Dry Pillows from the Laundry

Once the rinse cycle is done, it’s time to dry your pillows. To do this, use a low-heat air cycle to slowly remove all the moisture. Drying your pillows properly don’t just give them back their pre-wash fluff, it also prevents mould from growing on an otherwise damp surface. A handy trick for getting a good dry is to put two tennis balls wrapped in socks in the dryer along with the pillows; the tennis balls can beat out any excess moisture as the dryer runs. Don’t be alarmed if you find that you need more than one cycle to fully dry your pillows. Once they’re done, try a smell-test to sniff out any remaining moisture.

A quick note about foam pillows: instead of throwing them in the dryer, it’s best to clean them using a vacuum. This is because they can’t get excessively wet. Once that’s done, you can run them on a no-heat cycle in the dryer just to shake off stubborn grime and dirt.

Get a Professional Cleaner

Washing your pillows regularly doesn’t just sound daunting if you’ve never done it before, but also time-consuming when you’re running on long work weeks and a tight everyday schedule. But not to worry — that’s what professional cleaning services are for.

A professional cleaner can do more than fluff the pillows in your bedroom — when it’s necessary, they can wash and dry them for you, so you’ll come home to a freshly made bed with clean pillows and the best sleep you’ve had in a while. By keeping a regular cleaning and washing schedule, you can get the best use out of your pillows for years to come, instead of replacing them quickly — or worse, getting less than the good night’s sleep you need when they’re musty and dirty.

For more information about cleaning your pillows and bedding — or anything else — call Maid4Condos at 647-822-0601 or contact us here.

Cleaning Tips to Beat the Post-Vacation Blues

Getting back into everyday life after a fabulous vacation is extremely difficult. Jet-lag can leave you feeling blue, tired and uninspired. Your bags are stacked in the front hallway and the last thing you want to do is open the door to a messy, disorganized condo. Instead, you turn the key in the keyhole, and push open the door and walk into a glittering clean home. Reality hits, turning that frown upside-down; you had the foresight to hire a professional cleaner to not only clean your condo but to water your plants while you were away.

Cleaning Tips to Beat the Post-Vacation Blues

The best way to ensure you won’t have a post-vacation hangover is to hire someone to do a vacation clean of your condo while you are away.

  1. Come up with a gameplan

    Planning is key: make a pre-vacation checklist of all the chores you need to accomplish and a second list for packing to eliminate stress. Follow the list and do not deviate from it. However organized you feel you are, you will leave a small mess left from excitement and rushing around of leaving for vacation. There will be a few dirty dishes, a bit of laundry, trash removal and clothes thrown around because you didn’t have room in the suitcase for them.

    The best way to ensure you won’t have a post-vacation hangover is to plan for a cleaner to come in to look after everything you didn’t have time to complete on departure day.

  2. Do the laundry

    No one wants to get home and find that there is a pile of dirty clothing still in the hamper. The thought of doing a mountain of laundry post-vacation is daunting. When you hire a cleaner, while away on vacation, you don’t have to worry about that. All you are left to do is to unpack your suitcases, sort your laundry, and put a load into the washer.

    Walking into the bedroom to see your bed has been made and the pillows fluffed will encourage you to get those bags unpacked quickly and the laundry completed in one fell swoop.

    The best way to ensure you won’t have a post-vacation hangover is to plan for a cleaner to come in and finish the laundry: wash, dry, fold and put away.

  3. Arrange plant and pet care

    It is no secret that both pets and plants can be a problem when leaving for a vacation. Lonely and bored pets can get destructive and plants can wilt and die. Coming home to a messy house and dead plants due to vacation is one sure fire way to catch the post-vacation blues. Even the most independent cat can benefit from someone popping in once or twice while you are away to scoop the litter and top up the food bowl, and, while they’re at it, water the plants.

    Hiring a cleaning service that specializes in pet and plant care can alleviate pet and plant anxiety. The best way to ensure you won’t have a post-vacation hangover is to plan for a cleaner to come in and check after your pet and plants: feeding, watering, cleaning.

  4. Organize your photos

    Reminiscing about your trip with your friends and family may be one of the top ways of beating the post-vacation blues. Have fun showing everyone your photos as you organize them neatly into folders on your computer and decide which one you would like to get printed. The organization will help you relax and decompress after all the travelling.

    What’s more, since you came home to a clean house that was well taken care of by a cleaning service while you were away, you won’t have to worry yourself with any other chores. Doesn’t that sound great? The best way to ensure you won’t have a post-vacation hangover is to plan for a cleaner to come in and clean your entire home so you can enjoy taking time to reminisce about your vacation post-vacation.

  5. Last minute details

    There is always something that needs to be done while you are away. Schedule your cleaner to come to your home to ensure all trash cans are empty and to take out the trash out on garbage day. You can also schedule days that you want someone to come in to check on your home to ensure that timers and security cameras are working and that the thermostat is at a proper setting. In fact, there are many extras your cleaning service is willing to do for you to make you enjoy your vacation worry free.

Scheduling a cleaner to come in to help you maintain your home while you are away on vacation will chase any post-vacation blues away. A professional house cleaning team will take care of your pets, plants, and home, making for a stress-free vacation and an exceptionally clean home upon your return.

For more cleaning tips to beat the post-vacation blues, call Maid4Condos at 647.822.0601 or contact us here.