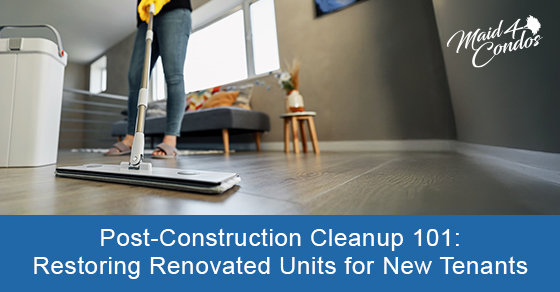
A finished renovation can still leave a condo feeling gritty, dusty, and not quite ready to enjoy. New cabinets, fresh tile, repaired walls, or updated flooring may look beautiful, but fine dust can settle long after the tools are packed up and the contractors leave.
At Maid4Condos, we know renovation cleaning services can help condo owners deal with the mess regular cleaning may miss. Fine dust can sit on counters, trim, ledges, cabinet interiors, floors, vents, and appliance edges, making a newly updated space feel unfinished. For renters, landlords, property managers, and condo owners preparing for everyday use, move-in, rental, or listing, our cleaning services can help turn the project site back into a home.
Why Condo Owners Need Renovation Cleaning Services After A Project
Renovation dust is different from everyday dust. Regular household dust usually comes from normal living: fibres, crumbs, pet hair, lint, and dirt carried in from outside. Renovation dust may come from sanding, drilling, cutting, painting, cabinet installation, flooring work, drywall repair, packaging, adhesives, and materials moving through the condo.
That dust is often finer and more stubborn. It can settle beyond the room where the work took place, especially in condos with open layouts, shared airflow, compact hallways, and furniture that gets shifted during the project. A kitchen renovation can leave residue in the living area. A bathroom update can leave dusty tracks in the hall. Even a small repair can leave powder on baseboards, floors, door frames, and nearby fixtures.
Regular surface cleaning may remove the obvious mess, but post-renovation residue can be stubborn. It clings to textured surfaces, sits in grooves, collects along trim, and reappears after the first wipe. Condo owners may clean a counter, only to notice a new layer of dust the next morning. Floors can feel gritty after mopping if dust has settled into corners or under cabinet edges.
Our after-renovation cleaning support helps target the detailed areas that make a condo feel truly clean again. It can also save time when owners are already managing contractors, furniture deliveries, elevator bookings, repair timelines, or tenant turnover.
Post-renovation dust often hides in places such as:
- Baseboards, door frames, closet shelves, and window ledges
- Vents, light fixtures, appliance edges, and cabinet interiors
- Floor corners, balcony door tracks, trim, and bathroom fixtures
Renovation Dust Spreads Farther Than Most Condo Owners Expect
Construction dust moves easily. Airflow can carry it through open doors and around corners. Foot traffic can track it from a work zone to bedrooms, entryways, and bathrooms. Tools, boxes, materials, and furniture can also move dust through hallways, elevators, and shared building areas before it returns to the unit on shoes or equipment.
Condos often make this more noticeable. With less separation between rooms, dust from one project area can reach shelves, closet doors, appliance edges, vents, balcony tracks, and light fixtures. A freshly renovated kitchen may leave dust on living room floors or inside nearby storage. A flooring project may leave residue along door frames and baseboards throughout the unit.
Regular Cleaning May Miss Fine Dust And Debris
Everyday cleaning is usually built around normal mess: crumbs, spills, fingerprints, surface dust, and bathroom buildup. After-renovation cleaning needs more patience and detail. Fine dust can resettle after the first pass, cling to textured finishes, and remain in corners, grooves, and tight spaces.
A regular clean may wipe counters, vacuum floors, and freshen bathrooms. After-renovation cleaning often requires repeated wiping, careful vacuuming, mopping, and attention to ledges, trim, cabinets, fixtures, and accessible gaps. The work is less about making the condo look tidy and more about removing the residue that keeps the renovation from feeling finished.
Professional Dust Removal Service Helps Make The Condo Feel Finished
A renovation can look complete in photos while still feeling dusty in daily life. Imagine a new kitchen with clean-looking counters, but dust inside drawers, along cabinet fronts, under appliance edges, and across the baseboards. The room may be usable, but it doesn’t feel settled.
Our dust removal service support can help bridge the gap between contractor cleanup and comfortable living. That final cleaning step matters before moving furniture back, hosting guests, listing the condo, renting the unit, or settling into the updated space yourself.
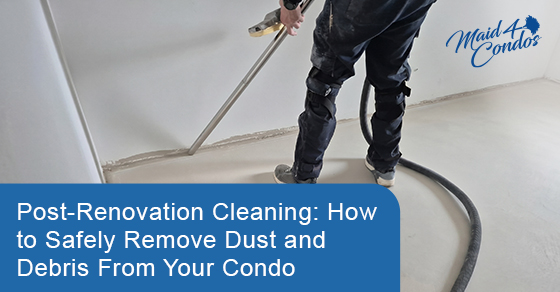
A Safe After Renovation Cleaning Plan For Condo Dust And Debris
Condo owners can handle light prep, but detailed after-renovation cleaning is often easier when our team can focus on the dust and debris regular cleaning may miss. The safest approach is to wait until renovation work is complete, large debris has been removed, and the space is ready for careful cleaning. Avoid touching sharp materials, exposed wiring, unknown substances, or contractor-specific waste.
Use this general sequence as a safe planning guide:
1. Wait until dust-producing work is finished and contractors have removed major debris.
2. Ventilate the condo where it is safe and practical to do so.
3. Remove loose non-hazardous items, packaging, and visible dirt.
4. Work from high areas down to lower surfaces, including shelves, fixtures, counters, baseboards, and floors.
5. Use dust-control methods that capture dust instead of pushing it into the air.
6. Pay attention to vents, ledges, corners, cabinet interiors, appliance edges, and door tracks.
7. Vacuum and mop floors carefully, knowing that more than one pass may be needed.
8. Contact professionals for heavy dust, sharp debris, large messes, or cleaning needs beyond normal household products.
Our renovation cleaning services are a practical choice when the dust is widespread, the unit needs to be ready quickly, or the condo is being prepared for tenants, buyers, guests, or move-in.
Start With Visible Debris Before Tackling Fine Dust
Loose debris, tape, packaging, protective coverings, and tracked-in dirt should be removed before detailed dust work begins. Otherwise, fine cleaning becomes harder and dust may keep spreading from one area to another.
Safety note: do not handle sharp debris, hazardous materials, exposed construction waste, or items that should be removed by contractors. Ask the renovation team or an appropriate professional to deal with those first.
Clean From Top To Bottom To Reduce Resettling Dust
Cleaning upper surfaces first reduces the chance of dust falling onto areas that were already cleaned. Light fixtures, shelves, cabinet tops, counters, baseboards, and floors should be approached in that order where practical.
Post-renovation dust may need repeated passes. A single wipe or mop can loosen dust without fully removing it, which is why floors and surfaces may need follow-up attention after the first clean.
Focus On Hidden Condo Dust Traps
Compact condo layouts can collect dust in places that do not stand out at first glance. Built-in storage, sliding tracks, vents, and tight corners deserve careful attention after renovation work.
Common dust traps include:
- Closet shelving, cabinet interiors, and drawer edges
- Window ledges, balcony tracks, and baseboards
- Bathroom fans, door frames, trim, and accessible appliance edges
Areas We Can Help Clean After Renovation Work
After-renovation cleaning needs vary by project, but certain areas usually deserve closer attention. Kitchens may need cleaning around counters, sinks, cabinet fronts, backsplashes, appliance surfaces, and floors. Bathrooms often collect dust around vanities, mirrors, fixtures, tile, tubs, showers, toilets, and flooring.
Living areas and bedrooms may need dust removed from floors, trim, shelves, doors, and accessible surfaces. Entryways and hallways can collect tracked-in dust from workers, tools, materials, and deliveries. For condos being prepared for move-in, move-out, rental, or listing, our broader cleaning support can help the whole unit feel ready for its next stage.
We offer cleaning services in Toronto and the GTA, with cleaning package options that can support condos needing more detailed care after a project. Exact service needs should always be discussed before booking so we can match the cleaning to the condition of the unit.
When To Book Renovation Cleaning Services For Your Condo
Timing affects the final result. The best time to book after renovation cleaning is usually after the main construction work is done, contractors have removed large debris, and the condo is ready for detailed attention. Cleaning before dust-producing work is finished can lead to repeated mess and frustration.
A practical schedule may look like this:
- After contractors finish major work and remove debris
- Before furniture, rugs, decor, and personal items return
- Before tenants, buyers, guests, or family members use the condo
Some dust may continue to settle after the first cleaning, especially after heavy sanding or drilling. A follow-up touch-up can be useful if the condo needs to look polished for a listing, handoff, or move-in date.
Condo owners should also coordinate cleaning around contractor schedules, building access, elevator bookings, deliveries, and move-in or move-out plans. A little timing strategy can save a surprising amount of stress once the renovation is finished.
Book Renovation Cleaning Services For Your Condo
Post-renovation dust can make even a beautiful condo renovation feel unfinished, especially when fine debris settles on floors, counters, cabinets, vents, and trim. If you need renovation cleaning services, we can help with after-renovation cleaning and dust removal service needs through our cleaning services.
Reach out to Maid4Condos today at 647-822-0601, email us at info@maid4condos.com or click here to get in touch online.
FAQs About Renovation Cleaning Services For Condos
Why Do I Need Renovation Cleaning Services After A Condo Project?
Renovation cleaning services help remove fine dust, debris, and residue left behind after construction or remodelling work. This type of cleaning is more detailed than regular cleaning because renovation dust can settle in hidden areas and resettle after the first pass.
What Is Included In After Renovation Cleaning?
After renovation cleaning usually focuses on removing dust and debris from visible and commonly missed areas such as floors, counters, fixtures, trim, shelves, cabinet surfaces, and other accessible spaces. Exact service details should be confirmed with us before booking.
Is Renovation Dust Different From Regular Household Dust?
Yes, renovation dust can be finer and more widespread than normal household dust. It may come from sanding, cutting, drilling, painting, and material installation, which is why a more detailed cleaning approach is often needed.
When Should I Book A Dust Removal Service After Renovation?
Book a dust removal service after the main renovation work is complete and large debris has been removed. This helps cleaners focus on detailed dust removal before furniture, decor, or daily routines return to the space.
Can Maid4Condos Help With Cleaning Before Moving Back In?
Yes, we can help condo owners prepare their space after renovation work through our cleaning services. This can be useful before moving furniture back in, welcoming guests, listing the unit, or settling into the updated condo.