Selling Your Home? Why You Should Prepare With a Deep Clean

Spring brings with it the real estate listing season in the GTA. As the last traces of the winter melts into city lawns, real estate agents are meeting with clients who are intent on selling their homes.

Regardless of the market climate, one thing is always certain — people buy clean homes. If you’re selling your home this spring, you need to set your sights on prepping your home for viewings.

Homebuyers have trouble seeing past the dust bunnies, dirty bathroom grout and stained kitchen counters. The best way to help buyers focus on the positives of your home is a deep clean. Here’s why a deep clean is a must if you want to sell your home fast.

Importance of a deep clean while selling your home

You’re used to the Dirt and Mess

Right now, you’re likely living in your home every day, which means you aren’t really looking at it too closely. It’s not uncommon to overlook the condition of the floors, window ledges, grimy tiles and other areas of the home because you almost become desensitized to the details. After all, it’s easier to ignore them than to clean them.

When you hire our home cleaning services to do a deep clean of your home, we look at every detail with a fresh set of eyes and will target every nook and cranny you might miss. We make it appeal to potential new occupants who will be shopping for a clean home.

Deep Cleans help Disassociate You from Your Home

Thorough cleaning by a home cleaning service allows you time to disassociate yourself from the house emotionally. You will have to keep up the cleanliness once the cleaning takes place, to get rid of that “lived in” look. That means you almost have to start living in the home as if you have already left — like a guest who doesn’t want their hosts to think they are messy.

You can Depersonalize Your House

To allow for a deep clean to take place, you need to clear away the clutter so that the cleaners can get to the floors, closets, cupboards, and other areas that tend to fill up with personal items.

Remove clutter and do an inventory of your belongings. Sort what you want to keep available until moving day. Pack away or get rid of things to make way for not only our cleaners but the new owners.

To make the cleaning process easier, pack up all the dust collectors, such as your personal photographs, family heirlooms, and knick-knacks that not only add to clutter but also become a distraction to house hunters. This depersonalization makes it easier for buyers to see themselves in the home without focusing on your items.

Rethink the Layout

Deep cleaning doesn’t just go around furniture. It gets under furniture to remove all traces of dust bunnies and other issues that can make your home less appealing, including smells. You never know what lurks behind and beneath your furnishings, and when selling your home, it is a must to move things away from walls to get every inch of mess.

While you’re at it, you have the perfect opportunity to rethink your furniture layout and make the most of your space. You can also consider removing unnecessary furniture pieces that are making things appear crowded.

A neat layout includes the basics that define each room, such as a sofa or loveseat and a chair or two in the living room, an appropriately sized bed, bedside table and dresser in the bedroom and a desk, chair and seating for an office. The right amount of furniture sells spaces while offering a purpose for each room to help guide buyers through your home.

It Gets You Organized

We’ve already mentioned the importance of removing clutter. Deep cleans also allows you to get your home more organized. This is especially important in smaller homes — such as condos — as buyers are going to be looking at how much closet and storage space they’ll be getting.

Because you will want to clear up areas for major vacuuming and dusting, you can show off storage space. This sends a better message to potential buyers who will view the home as neat and tidy, but also spacious with ample storage.

From organized, cleared kitchen counters, to caddies and baskets to contain your personal items in the bathrooms, the cleaning process allows you to look at opportunities to keep things neat and tidy throughout the home. Removing items and wiping down shelves in every cupboard and closet keeps things not only organized but also looking spick and span.

Improve the Appearance of Flooring

A deep clean can breathe new life into your flooring. Homebuyers are floor obsessed, so if you don’t have gleaming hardwood, it can take away from your home’s appeal. Regardless of the type of flooring you have, a professional home cleaning service will keep your floors looking as new and attractive as possible.

Stained carpets are a big turn off, so a steam cleaning is always best for all rooms with carpeting. This will also eliminate odours you might have become immune to!

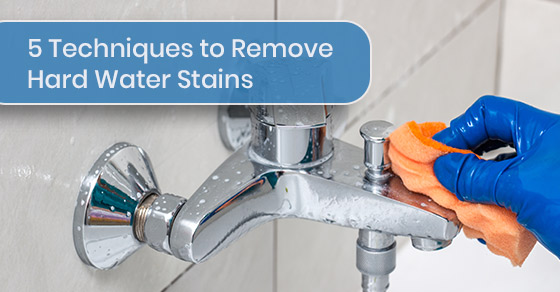
New Life for Your Kitchen and Bathroom

If you’ve given up on keeping your backsplashes, shower surrounds, and wall tiles clean in your kitchen and bathrooms, buyers will spot that right away. A professional deep clean will attack things like greasy build-up on tiles, discoloured grout, soap scum, and mildew by providing sparkling surfaces in the rooms where buyers can be the most discerning.

The kitchen and bathroom have a long list of cleaning tasks home cleaning services will tackle including:

  • Scrubbing tubs, showers, toilets and sinks
  • Cleaning shower curtains and bathmats
  • Washing all surfaces and mirrors
  • Cleaning window treatments
  • Scrubbing the tops and insides of kitchen cabinets and organizing the pantry
  • Vacuuming and washing behind the fridge and stove
  • Cleaning and organizing your refrigerator
  • Wiping down countertops, appliances and cabinet surfaces
  • Scrubbing sinks, the stovetop and oven

Once these tasks are complete, you can make a few touch ups to the caulking along the edges of counters, the bathtub, and in the shower to perfect the appearance of your tile.

Overall Sparkle

Our professional cleaning team will make every inch of your home sparkle, including your windows, door handles, faucets, mirrors, floorboards, furniture, light fixtures, and even your trash cans.

To learn more about why deep cleaning can help you sell your house, call Maid4Condos at 647-822-0601 or contact us here.

Best Techniques to Clean Your Home If You Have Allergies

For those seeking a clean home, allergies can be a real pain. Kicking up dust, scrubbing away mildew, and even composting can cause a chain reaction of sneezing and coughing which leads to a miserable afternoon. At Maid4Condos, we deal with these issues daily and have learned a few tips and tricks on how to clean home allergies away without feeling their wrath.

Here are a few ways you can organize and clean your home with less allergic reactions and a higher success rate.

Best Techniques to Clean Your Home If You Have Allergies

Clean Top to Bottom

In any room of your home, the best advice we can offer is clean top to bottom. This allows all the dust, dirt and debris to settle on the floor before you start sweeping and vacuuming. Otherwise, you wind up dusting ceiling fans and high shelves, only to find yourself mopping for the third time that day.

The same goes for the house. You should begin your cleaning spree in the uppermost rooms, working your way down the stairs, and finishing on the main level of the basement. This pushes dirt down the stairs before you’ve swept them, rather than after.

Working one room at a time also gives you a chance to completely clear a space before moving onto the next. This leaves less dust to kick up later when you find items from downstairs that belong upstairs.

Give Yourself the Air You Need

The worst part of maintaining a clean home — allergies or not — is the amount of dust that begins flying around the moment you break out the duster. A good way to relieve allergy symptoms caused by this dust is to open windows, and doors if possible, to get air flowing through. Fresh air will help keep pathways to your lungs open, and breath flowing more easily.

When you shut yourself into a closed-off space, even if it’s a big house, you’re trapping all that dust inside with you. Aside from vacuuming, the dust has nowhere to go but back down on the shelves and floors you just swept it from. And, of course, into your lungs as you breathe it in.

Tackle Mold and Mildew Early

Kitchens and bathrooms are a playground for mould spores and mildew. With the amount of food in the kitchen and liquid in your bathroom, these allergens can grow and spread without your notice. While cleaning these spaces, it’s best to start at the source.

Check open pipes and drains, crevices along the sides of tubs and sinks, and in areas not always visible, like the cupboards below your sink. Look for black, pink, orange, and brown marks which shouldn’t be there; bacteria can appear in a variety of colours.

Depending on the stage of mildew or mould, you can use different cleaners to get rid of it. A mixture of water and bleach is often effective but be especially careful while handling it. Wear gloves and keep it away from your nose and mouth.

Wash Bedding and Linens Regularly

You might be surprised to learn that one of the worst rooms in your house for allergens is your bedroom. As we sleep our bodies deposit dead skin cells, hair, and dust into our bedding. It settles into linens, carpets, and even between floorboards. If you’re getting goosebumps just thinking about it, you’re not alone.

Vacuuming your bedroom regularly is an excellent way to avoid allergies. You should also strip your bed once a week and thoroughly launder all linens in your bedroom. The same goes for towels, face cloths, and dishcloths, which collect bacteria.

This bacteria grows and spreads the longer it is left around, so regularly washing towels and cloths will keep your home cleaner longer.

Use a Dehumidifier Where Needed

It might sound like more of an air quality tip than a clean home allergies removal tip, but a dehumidifier is an excellent way to rid your home of dampness. Bathrooms are especially bad for hoarding humidity, which causes mould and mildew to grow unchecked. It’s no good to continuously clean mildew from the bathroom if the state of humidity keeps it growing.

Dehumidifiers can be installed as permanent fixtures or used as needed. If your home gets especially humid, try running the dehumidifier at night while you sleep.

Remove Clutter Where Allergens Might Hide

We all have that one room in our home full of clutter and boxes. While storage is an essential part of life, it’s also an area that gets filled with bacteria and dust; and is often cleaned the least.

Cardboard boxes attract pests, which flock to eat or live inside the cardboard. In between boxes, shelves, and knickknacks dust begins to gather, spinning cobwebs and creating havoc for your lungs should you ever enter the room.

Keeping your storage spaces clutter-free, organized, and regularly dusted minimizes the chance for pests and allergy outbreaks. Remember, the dust which gathers here spreads to other portions of your home, moving in and out of air vents, and rustling through the halls when the door is swung open.

The best way to manage the allergens in your storage space is to treat it like any other part of the home and give it a weekly cleaning.

Hire a Maid Service

Finally, an amazing resource for those who suffer from allergies while cleaning is to hire a maid service. Professional cleaners are trained to handle even the toughest messes in everything from residential housing to high rise condominiums.

These professional services are trained to tackle allergen-related cleaning tasks carefully and always with the client in mind. Rather than rustling up allergens which will cause you an allergy attack the minute you walk through the door, we always minimize allergens by cleaning thoughtfully and purposefully.

To learn more about how to protect your home from allergens, call Maid4Condos at 647-822-0601 or contact us here.

7 Ways to Clean Your Home With Baking Soda

While the beginnings of modern baking soda didn’t appear until the early 1940s, sodium carbonate has been used in ancient life as far back as 3500 B.C. as a form of cleaner in Egypt.

Its most modern form was developed to replace yeast in recipes used by Alfred Bird’s wife in Great Britain. He developed the formula because she was allergic to baking yeast. His invention would go on to provide many uses to modern man, including cleaning our homes.

From brushing your teeth to polishing mirrors, baking soda is a commonly found household item with 101+ uses. At Maid4Condos, we are constantly turning to solutions including baking soda for a chemical-free cleaning service our customers can count on.

Here are some of our top baking soda clean tips for those who are thinking of trying baking soda for themselves.

7 Ways to Clean Your Home With Baking Soda

1. Stinky refrigerators and compost bins

One thing your fridge, garbage, and compost bin have in common is the ability to really stink up a place. Strong smells emanate from food sources and become absorbed by other materials.

In the case of your refrigerator, the non-smelly food absorbs these odours, and unfortunately, this also alters their taste. In your trash and compost bin, the plastic material of the bin absorbs the smell, making them stink over time.

You can prevent or remove these terrible smells with a simple trick of sprinkling baking soda into the bin or stacking an opened container of baking soda in the door of your fridge. The baking soda absorbs the odour before any other material, protecting your home and your nose from offensive scents.

2. Carpet cleaning

Carpets are hoarders of dust, bacteria, debris, and odours. From pet hair to food crumbs, our poor carpets get put through the wringer. At Maid4Condos, we have seen many clients reach the point where they have been ready to throw a carpet in the garbage before we offered our baking soda clean tips.

Save your carpet and your pocketbook through the simple use of baking soda. To keep your carpet fresh, sprinkle baking soda all over it at night before you go to bed. Be liberal with the powder and then stay off the carpet until morning.

Once the baking soda has had a chance to set in and absorb stains and odours, vacuum it up. It may take a few trips with the vacuum cleaner and be sure to empty the chamber after each pass. When you’re finished, your carpet will smell as fresh as the day you bought it and be far cleaner for the effort.

3. Polish silverware with an overnight soak

Another of our baking soda clean tips that require overnight activity is the silverware soak.
Over time, your silverware takes a beating, gets stained, and even tarnished. Baking soda and water is the perfect combination to tackle these tough to remove silverware issues.

In a large bowl, mix 4 tablespoons of baking soda with 4 cups of water. Stir gently and place any silverware which needs polishing into the bowl. These pieces should all be clean before you place them in the mixture, as it works better with as little food particles stuck on as possible.

When you wake up in the morning, remove the silverware from the bowl, rinse, dry, and voila! Good as new.

4. Use baking soda to unclog your drain

Ever try the experiment where the vinegar and baking soda make your paper-mâché volcano explode? The same science that won you the first-place ribbon can help you get out of sticky situations when the drains in your house get backed up.

The acid in the vinegar acts on the baking soda, causing it to fizz up. These air bubbles and the chemical reaction therein eats away at food particles, and other materials clogging up the drains in your house.

This is an amazing alternative to the harsh chemicals used in unclogging agents, which could damage delicate plumbing in your home. A bonus to this method is the polishing of stainless-steel sinks after the mixture has been rinsed away. You don’t even have to scrub them much, because the reaction between the two ingredients breaks down food and stains, leaving a shiny metal sink.

5. Get rid of bacteria in your kiddie pool

Nothing is quite as fun as splashing around in the kiddie pool on a hot summer day.

Unfortunately, once the pools are stored for the winter, any residual bacteria or liquid causes mildew to grow. You can get rid of this unfortunate buildup with a rinse of warm water and baking soda.

The antibacterial properties of baking soda wash away the mildew and prevent it from coming back, as the pool is wiped dry and stored properly.

6. Add a cup to your laundry

If you’ve been noticing your laundry looking dim and faded, a cup of baking soda could be just the thing you need. Brighten colours, whiten whites, and darken blacks with a scoop of baking soda.

The baking soda is added in with your standard washing detergent. Not only does it brighten and whiten, but you’ll notice every piece of laundry smells a little bit fresher than it would on a standard load.

Baking soda in the laundry is especially great for loads with any items which have been treated for stains. The baking soda acts on the stains, helping bleach them out while retaining the integrity of the materials.

7. Rid your home of litter odours

Cats are beautiful majestic creatures, which make excellent companions, however, dealing with a litter box is no walk in the park. Adding a sprinkle of baking soda after every cleaning ensures your house will never smell like you have cats.

In fact, many of our clients’ friends and neighbours are surprised to learn they even own a cat, because it’s so difficult to detect any note of litter in the house.

If you’re interested in learning more baking soda clean tips, call Maid4Condos at 1-647-822-0601 or contact us here.

How to Properly Clean Your Mirrors

Of all the surfaces to clean in your home, the shiny ones are the most finicky when it comes to creating a perfect sheen. Mirrors are tough to clear of fingerprints and smudges without smearing everything around and making it worse.

There’s nothing quite as bad as spraying and wiping a mirror, only to revisit it moments later and see streaks where the cleaner touched it. So, what can you do as a homeowner to eliminate these problems and create the perfect streak-free mirror you deserve?

At Maid4Condos, we receive this question often, and while we truly believe nobody cleans a mirror quite like us, we’re happy to share some tips and tricks for the DIY’ers out there.

How to Properly Clean Your Mirrors

Pre-Cleaning Your Mirror

It sounds like overkill, but before you get to the polishing and shining of your mirror, you should focus on the actual dirt and residue living there.

The most difficult mirrors to clean are those situated in the bathroom or over a bedroom vanity. These mirrors receive a generous helping of toothpaste splatter, makeup particles, and hairspray residue.

But, isn’t that what the glass cleaner is supposed to take care of? Not exactly. Glass cleaner removes dust and smears but doesn’t penetrate anything more substantial than the oil from your fingertips.

Before you get to polishing invest in some cotton balls and rubbing alcohol. The cotton balls offer the perfect amount of texture to break apart stuck-on gunk without scratching the mirror.

The alcohol penetrates even the thickest hairspray and weakens its bond to the glass. This makes it much easier to wipe away. Alternatively, a combination of 1:1 vinegar and water does the trick.

Polishing Your Mirror

With deep mirror clean tips out of the way, it’s time to tackle the surface with a good polishing technique. The best cloth is a microfiber with a flat weave, and the best cleaner is any glass cleaner or home-made vinegar spray.

An important part of this process is applying an even yet minimal spritz of cleaner. Too much cleaner and you’ll be left with drip and streak marks. A light misting is best.

When wiping, begin at the top and working your way down so that as you wipe, residual cleaning solution drips down and is caught up in the next swipe across the mirror. Begin at the left corner and glide to the right. Repeat again and again as you move down the mirror. By the end, you should be able to wipe the cloth across the bottom of the mirror, leaving a perfectly clean space.

Sometimes, spots get missed and splotches occur, even when you’ve taken care to clean evenly. If you notice one or two small spots where the sheen is uneven, try gently rubbing a dry microfiber cloth over the spot. So long as the spot wasn’t caused by oil or grease, the area should buff clean in a few swipes.

If it is some form of grease or residue, the spot will need to be cleaned by your vinegar solution again before trying to buff it out.

Mirror Cleaning Tips to Avoid

Now that we’ve covered the most rewarding methods of mirror cleaning, let’s visit the mirror clean tips you should avoid. Some of these cleaning faux pas are based on folk tales, while others are just common sense to avoid.

Most leave your mirror worse than they started and cost you time and supplies you could save by using more of the above mirror remedies

1. Paper towels

It’s an easy staple to grab and go with, but paper towels are full of tiny paper particles, which leave a dusty-looking residue on the surface of the mirror. The result is a powdery, chalky visual through which you can’t see yourself clearly.

2. Newspaper

Your grandmother and her grandmother before her probably all used newspaper to clean their mirrors.

Unfortunately, the ink and paper we use today are very different from newspaper products of yore. Now, you’re likely to see ink transfer and other issues crop up, making the surface murkier than it already is.

3. Bath towels

Wiping a steamy mirror always produces a perfect looking sheen. Only until the mirror cools, the condensation subsides, and the steam fades. Then, all you’re left with is the smudgy outline of where your bath towel touched the mirror.

4. Multi-surface cleaners

Windex and other glass cleaners are almost always the best options for a squeaky-clean mirror. Non-glass cleaners tend to leave a residue behind, sometimes greasy in appearance. This is because of the chemicals inside which are designed to treat specific surfaces like wood or ceramic.

5. Abrasive cleaning tools

It might seem obvious, but some people aren’t sure which tools are good to use on glass and which aren’t. To polish a mirror, all the best mirror clean tips suggest a microfiber cloth with a flat weave. These soft cloths detract from the chance of scratching.

Hopefully, this list of don’ts is just as informative as our list of dos.

If you’re interested in learning more about mirror cleaning, call Maid4Condos at 1-647-822-0601 or contact us here.

5 Techniques to Remove Hard Water Stains

Hard water is nobody’s friend, clogging drains with buildup and leaving unsightly residue around the bathroom. At Maid4Condos we see plenty of hard water problems among our clients, and while there is a simple solution to even water consistency, not everybody has the means to do so.

Hard water is caused by minerals like calcium and lime, which filter into the water supply from natural sources, creating stains and buildup along the way. While drinking hard water offers some benefit due to the mineral content, it can be detrimental to pipes and plumbing, and a hassle to clean.

If you’re looking for some way to simplify the hard water stain removal process, look no further. Here are 5 tips to keep your tub, sink, and shower, lime scale-free.

5 Techniques to Remove Hard Water Stains

1. Try using vinegar

One of the oldest tricks in the book for dealing with stains relating to hard water is vinegar. By mixing a ratio of 1:1 vinegar and water in a spray bottle, you create a powerful stain-fighting agent with no harsh chemicals, additives, or allergens.

Nature’s stain remover uses the power of acid to eat through mineral deposits and stains, polishing bathroom hardware to a high sheen once again.

The best way to apply the vinegar spray is with a combination of rubber gloves and a small scrub brush. Even an old toothbrush will do the trick, getting into hard to reach areas and thoroughly scrubbing every crevice.

After spraying your vinegar mixture, allow the solution to sit on stained surfaces for up to 15-minutes. This allows the vinegar acid to penetrate the stain and begin breaking down the minerals within.

The bristles on the brush then tackle the tough outer shell of the calcium buildup, breaking it up so you can wipe away the final residue with a soft cloth or sponge.

Some things to remember while using the vinegar for hard water stain removal are:

  • Never spray the solution onto hardwood as it will destroy the finish and stain
  • For extremely tough stains, increase your solution to 2:1 vinegar to water
  • Always use a soft-bristled brush rather than a harsh cleaning tool like steel wool
  • The odour of vinegar dissipates quickly, but you can add 1-2 drops of peppermint essential oil to freshen the smell

At Maid4Condos we have several go-to cleaners we use for specific tasks. Vinegar is tried and true, and environmentally friendly.

2. Make your bathroom lemony fresh

Another natural cleaner many homeowners turn to for the hard water stain removal process is lemon juice. Lemons, like vinegar, are loaded with natural acids that eat away at mineral buildup, allowing the hardened calcium to breakdown and scrub away.

Lemon juice can be applied without dilution. While it’s a natural juice from fruit, it’s still a good idea to wear gloves or avoid getting juice into cuts or dry skin as it will sting.

Lemon juice should be applied to stains approximately 10-minutes before receiving a wipe down with a damp cloth or sponge. For tough, stuck on mineral deposits, the same soft-bristled cleaning brush will help break apart buildup.

3. Use bleach and dishwasher detergent for jet tubs

Jet tubs are notorious for backing up when hard water is present. This is due to the crystallization of minerals in and around the jet fixtures. Because the jets run directly into the tub, rather than simply sitting exterior to it, it’s important that your cleaning solution achieve a deep clean.

For this, we suggest a mixture of ½ cup dishwashing detergent and 1 cup of bleach. If you are uncomfortable using bleach, vinegar can be used in this recipe as well.

For best results, fill your tub with hot water until the water reaches just above the jet fixtures. Pour in your chosen cleaning mixture and run the jets. This mixture should flow through your jets for 15-minutes and then soak in the tub for another hour. Be extremely careful handling the bleach and wear gloves if you must submerge your hand into the water for any reason.

After the hour-long soak, run the jets for another 15-minutes, drain, and rinse. You’re likely to see a huge difference without the need for a brush or sponge.

4. Use talc and hydrogen peroxide for granite

Granite is a tricky surface to clean, and its smoothness contrasts so dramatically against the granule buildup of minerals. To properly clean your granite surfaces and remove stains from hard water, try a mix of powdered talc and hydrogen peroxide.

The two combine to form a paste that easily smears across the granite and tackles tough stains without scratching the surface.

Let the ingredients sit on the stain for 5-minutes before gently scrubbing with a soft brush. Rinse with warm water and wipe clean with a soft cloth. Unlike the above cleaning methods, the talc and hydrogen peroxide mix may require a few attempts before the stains are fully removed and the buildup of minerals clear away.

You may experience the urge to scrub harder but it’s best to keep cleaning strokes consistent and gentle throughout the process to maintain the integrity of your granite surfaces.

5. Call in the professionals

If all your hard work and hard water stain remove attempts have failed, there’s still one solution to try: call a maid service.

Professional cleaners specialize in tough stains and gentle cleaning methods. By investing in a cleaning service, you not only save yourself time but also ensure that each surface is treated with your homes’ best interest at heart.

For more tips on removing hard water stains, call Maid4Condos at 1-647-822-0601 or contact us here.

6 Tips to Keep Your Vents Clean

Vents are often overlooked as just another part of the home. However, they play a big role in heating, cooling, and air circulation. When vents aren’t properly cleaned, not only do they become unsightly, but a buildup of debris can prevent proper airflow. This creates strange odours and could even be a fire hazard.

Maid4Condos are pros when it comes to managing vents. While we recommend calling in the professionals for duct maintenance and furnace cleaning, there are some DIY tricks for easy vent maintenance. Here are 6 of our favourite vent cleaning tips to keep your vents working properly year-round.

6 Tips to Keep Your Vents Clean

1. Dust regularly

It’s such a small thing, but it makes a big difference in your home. Dust causes allergies, asthma symptoms, and bad odours. Especially when hot or cold air is blowing through the dust day in and day out. Dusting your vents regularly minimizes the buildup of dust along vent grates.

You may be tempted to purchase one of those cute feather dusters you see in movies and on TV, but the best way to dust is with a soft microfibre cloth. The material in these cloths swipes away dust quickly and easily by collecting it within its fibres. Rather than spreading the dust around into the air, microfibre cloths remove them from your room entirely.

Dusting seems tedious, but the more you do it, the less time it takes. We recommend dusting about once a week to keep dust at bay.

2. Wipe and disinfect

The second of our vent cleaning tips is to disinfect and thoroughly clean your vents. This is a chore that doesn’t require regular attention. A few times a year, remove the grates from floors, walls, and ceilings, and soak them in hot soapy water. Wipe them all down and dry them before replacing them in your living space.

The most common buildup in a vent is dust, but there are plenty of other items that make their way into your vents regularly. Pet fur and dander, human hair, food particles, outdoor dirt, and spills all wind up in and around our vents at some point, especially floor vents.

When you wash them thoroughly, you remove all the bacteria along with the stains and buildup. This deep cleaning reduces foul smells when the thermostat is activated and leaves your vents looking fresh and clean.

3. Vacuum ducts

Vacuuming inside your vents is a great way to maintain the cleanliness you’ve achieved by dusting and wiping. This detracts from the amount of dirt being blown around inside the air ducts. Having a furnace cleaning company come in to clean your furnace and thoroughly clean air ducts is a great exercise in vent cleanliness. Again, this isn’t common practice and should be done about once or twice a year.

Vent grates are only the tip of the iceberg regarding your home’s air circulation. Cleaning inside benefits the outside too. The best vacuum to use for cleaning vents is one designed for heavy-duty cleaning, such as the Shop-Vac.

Anything with a long hose and cleaning attachment will work well enough for a basic vacuuming. A furnace company should be consulted if your vents are overly blocked, or you are concerned about airflow.

4. Wax and polish

Just as you’d wax a car to maintain that glossy finish, you can wax your vents with a soft rag as well. It’s best to apply wax to a clean and completely dry vent grate. If you’re giving your vents a scrub, wait until they drip dry overnight before waxing them the following day.

Polish and buff it until all the wax is completely rubbed smooth and the vent looks shiny and clean. Excess wax will play an opposite role to nice smooth wax. Rather than deflecting dirt and dust, it will collect it more excessively.

When you screw the vent grate back in, you’ll notice a big difference in their appearance. It also decreases the amount of additional cleaning your vents will need throughout the year. The wax keeps dust and fibres from sticking to the grate, erasing the need for much of the dusting you’d do throughout the day.

5. Call the professionals

Finally, when in doubt about the best vent cleaning tips and which DIY hacks work, call in the professionals. A professional maid service will help you clean, polish, and maintain your vents, inside and out. At Maid4Condos, we include vent dusting and cleaning among our services.

Vents are a bit of a chore because of how many there are in most condos and houses. Between work and life, nobody has the time to really focus in on vents. That’s where we come in with our professional grade cleaning tools and expert knowledge.

6. Take your time

Cleaning vents takes time; don’t let it overwhelm you. Instead, break down the chore room by room, and tackle one half of the house one day, and the other another day. It’s okay if not every vent is cleaned all at once, so long as the chore gets completed.

Taking your time cleaning vents will prevent you from missing one. It helps to have a count of the vents in your home before you start, and a schedule for vent maintenance at hand.

For more tips on keeping your vents clean, call Maid4Condos at 1-647-822-0601 or contact us here.

How To Clean Your TV Screen

One of the most popular and beloved devices of any family home is the flat-screen television. Modern condo owners use TVs to play music, videos, games, and more. When it comes to TV cleaning tips, nobody knows more than Maid4Condos.

Flat-screen TVs use a special finish which keeps colours and pictures crisp. This means you can’t use just any cleaner to wipe it off. Unfortunately, the static electricity in our televisions and the natural clinginess of glass attracts dust and particles in the air to cling on. This, combined with fingerprints and other marks, makes it tough to enjoy your favourite programs.

So, how can you polish your flat screen in a way which retains the integrity of the screen? Here are our top TV cleaning tips.

How To Clean Your TV Screen

Read the User Instructions

Chances are, your new TV came with a list of instructions, including the best method for cleaning. Depending on the make of your TV, you may use a different mode of cleaning. LCD screens, for example, are super sensitive to scratches and the deterioration caused by certain cleaning products.

Many TV owners turn to basic window cleaning products as a first resort. We understand where this thought originates: glass window = glass TV. What’s the difference? The difference is what’s under and on top of your television glass. Special anti-glare coatings and other protective features could be ruined by any ammonia-based cleaner.

It’s also important to be cautious before cleaning your flat screen TV because some modes of cleaning could negate your warranty. Before you wipe, read the warranty guidelines, or give the manufacturer a quick call. This seems like a lot of work to clean the grime off a TV screen, but it’s worth the effort if you have a nice TV set.

Using the Appropriate Materials

Cleaning with the right tools is the most effective way to reduce the risk of scratching and film removal, while effectively removing dirt. Maid4Condos recommends a soft microfibre cloth with anti-static characteristics.

Think of the type of cloth you might use to clean your eyeglasses or a camera lens. This is the same kind of care you want to take with your television. You wouldn’t just wipe your glasses or camera on a pair of jeans, you’d use the cloth provided with your eyewear or camera kit.

If you can clean the screen without the use of water or chemicals, this is best. A dry microfibre cloth will remove more than you realize. Wiping gently in a circular motion, you’ll see everything from dust to finger smudges clearing away with ease.

Some people try television cleaning kits, which boast specialty cleaners and cloths. While some of these may work, it isn’t recommended that any chemical cleaner be used on your flat screen.

Clean More than Just the Screen

While your screen is certainly the most noticeable part of a television set, it’s not the only component that requires cleaning. Other features to focus on include:

  • Speakers
  • Ports
  • Cables
  • Cords
  • Remote control

These should all be wiped occasionally to remove dust. Your television remote, especially, requires regular cleaning as they are prone to bacteria and oil from our hands and fingertips.

Using harsh chemicals, wipes, or even anti-bacterial cleaners on your remote could remove the print from the buttons. Before you clean your remote, remove batteries so you don’t push buttons and reset current settings. There’s nothing worse than trying to wipe down a remote and deleting all your saved movies and shows.

Cleaning between buttons and the intricate lines of TV speakers keeps your television running longer. It removes the risk of dust filtering into the electrical components of the unit and causing it to burn out quicker. As far as TV cleaning tips go, this is one of our best.

TV Cleaning Safety Tips

Safety is of the greatest importance when working with any electronic. Your television is likely plugged into a power source, along with multiple other machines in your entertainment centre. Disconnecting these cords to prevent shock or electrocution is wise. This is especially true if you plan on using any liquid in the cleaning process.

Knocking over your television and nearby electronics is also a danger during cleaning. Be sure that you use gentle wiping motions and secure unsteady components before beginning. Some people choose to place the television base on the floor for easier access to all components before cleaning.

However you choose to tackle this chore, the most important of our TV cleaning tips is certainly safety. Please be careful when managing your electronics.

Prolong the Life of Your Flat Screen

Regular cleaning is one way to keep your TV running. However, there are other ways to prolong the life of your unit. For example, turning off your television when not in use, not only conserves electricity but also increases the longevity of the screen. Similarly, pausing a movie or show on one picture too long can damage the screen of your TV. The image and light being projected onto the screen could leave marks or discoloration in certain areas.

Ask the Professionals

Some television owners simply don’t have the time or tools to maintain electronic care. Here in Toronto, especially, there always seems to be so much to do and see. Cleaning the flat screen is often the last thing on anybody’s mind. To help remove this from your list of chores, Maid4Condos is here to help.

We work closely with clients across the greater Toronto area performing services from deep cleaning and stain removal to dusting and general condo upkeep. Whatever you need help with, we’re happy to lend a hand.

For more information on how to properly clean your TV, call Maid4Condos at 1-647-822-0601 or contact us here.

Best Ways to Clean Sofa Stains

There’s been a revival in cloth-covered sofas over the past few years, with leather and wood fizzling in and out. While the cloth look provides plenty of options for colour, pattern, and texture, it also opens doors to stains. The porous material of most cloth couches shows marks and are difficult to wipe clean.

At Maid4Condos we deal with plenty of tricky fabrics. From carpets to linens and of course, couches, we know what it takes to tackle a sofa stain and best clean those hard to manage fabrics.

To help our clients better manage their cloth couches, we’ve compiled a list of tips for removing those nasty sofa stains. Here’s what you should know.

Best Ways to Clean Sofa Stains

Follow the Symbols on the Tag

Just like articles of clothing, cloth-covered furniture comes with a tag which should tell you the cleaning requirements. The types of materials used, along with brief instructions should be visible. This should include an abbreviated instruction of W, S, WS, or X. The first two indicate water or solvent-based cleaners, the third a combination, and the last vacuuming only.

Check the Manufacturer’s Instructions

Before you begin wiping, rubbing, or adding any cleaning solution to fabric, it’s best to check with the manufacturer. Depending on the sofa stain, clean best by knowing which cleaners to steer clear of and which are safe to use on your furniture.

The manufacturer’s instructions should supply you with a list of dos and don’ts for products and methods. Some furniture shops provide customers with instructions on how to maintain their new product. This might include washing and stain removal options.

Preparing for a Sofa Cleaning

As you prepare to remove stains or give your sofa a thorough cleaning, you should gather the appropriate tools. We recommend:

  • Distilled water and white vinegar
  • A water receptacle
  • microfibre cloths
  • Dish soap
  • Upholstery attachment and vacuum
  • Steam cleaner

Once everything is ready to use, your first task is removing dust and debris from the couch, so it doesn’t get rubbed in during the cleaning process. The upholstery attachment on your vacuum will help remove crumbs, dust, dirt, lint, and anything else inside your sofa. Then, you’re ready to clean.

Spot Cleaning and Stain Removal

The first rule of spot cleaning is never spray anything directly on your sofa. Instead, you want to dampen your microfibre cloth with the water or solution you use and apply it to the stain a little bit at a time.

We recommend starting with a solution of 1 cup of distilled water, ½ tablespoon of white vinegar and ½ tablespoon of dish soap in a spray bottle. Shake well to thoroughly mix and wait for the foam to subside. Now, spray a small amount onto your cloth and dab the stain.

There is a natural urge to rub when we clean. This comes from the scrubbing motion we make to take dirt and grime of hard surfaces. Unfortunately, with cloth furniture, rubbing a stain causes it to spread, bleed, and sometimes damages the fibres in the material of the sofa. Therefore, dabbing and botting is preferred.

Check if it’s Machine Washable

You may not realize that a washing machine is an option, but many couch cushions have removable covers. Unless your couch is a continual piece of fabric, your seat cushions and backrest cushions may have washable cases. If so, it’s a simple task of removing the stained case, applying stain remover, and tossing it in the wash.

Again, never wash your sofa upholstery before reading the washing instructions. These will specify whether the cushion covers are dry clean only, if you can use detergent, or if they should only be washed in hot or cold water. Some may be eligible for a spin-dry, while others should be laid flat to dry.

A Deep Steam for Lasting Freshness

Whether your sofa is stained or not, a deep steam clean will remove odours and freshen fabric for months. Get rid of excess dust and buildup and bring back that new couch smell and feel. Steam cleaning uses water and heat to naturally kill bacteria. It does require that your couch have the “W” or “WS” abbreviation on its cleaning tag, as steam cleaners use water.

Every steam cleaning device has its own set of instructions for use. It’s important to follow these carefully, especially regarding the amount of water, or cleaning solution allowed in the device. It’s also crucial that you use caution as you work with a steamer. The heat in the steam released from these machines is hot enough to burn you.

As with any other sofa stain, clean best by beginning with a thorough vacuuming and stain removal. As you steam, remember to remove couch cushions and steam each individual piece of fabric. If you own a dehumidifier or fan, it helps to turn these on to maximize drying speed.

Call a Maid Service

Finally, if at first you don’t succeed, or you simply haven’t the time to spend cleaning your sofa – call in the reinforcements. Maid4Condos are well-versed in all things stain removal. From mud to blood, we can get it out. It all comes down to the right combination of cleaner and elbow grease.

To learn more about how to properly clean your couch, call Maid4Condos at 1-647-822-0601 or contact us here.

New Years Resolution: How to Clean More

2020 is here, but have you planned those New Year’s resolutions? We all make them; but how often keep them? Especially when it comes to cleaning the house.

Maid4Condos understands how tough it is to get motivated when a mess feels like, “too much to handle”. To help you stay on track this year, we’ve compiled a list of ways to keep your clean New Year’s resolution one step at a time.

New Years Resolution: How to Clean More

Get Rid of Your Clutter First

The biggest problem condo owners face is space. The less space you have, the bigger the mess appears. By decluttering your condo, you maximize space and minimize the appearance of unmanageable clutter.

This may seem like another overwhelming process but it doesn’t need to be. By managing the declutter process by room, you break things down into easier tasks. Starting with the smallest rooms in your home gives you a sense of accomplishment and jump-starts your decluttering. A few key areas to focus on here are:

1. Clothing

Clothing is something we accumulate steadily over the course of life. Unfortunately, not every style is timeless. This results in a closet full of unworn clothing taking up space you could use for more important items. Go through each article of clothing and think about the last time you wore it. If it’s been longer than a year, you probably don’t need it anymore.

2. Toys

Children and pet toys build up quickly, especially if you’ve got more than one child or pet. While some older toys hold sentimental value, others are simply forgotten about and wind up sitting in the back of closets, toy boxes, and playrooms. Sort through toys to determine which are still age-appropriate and in good working condition. Anything that isn’t sentimental can be donated or sold at a garage sale.

3. Documents

Paperwork is something we humans collect in piles and boxes. Despite the rise of digital documents, homes across Toronto are still filled with tax receipts, school projects, and old reports. If you don’t already have one, a filing cabinet takes the mess out of your document storage. Another way to minimize is by scanning and uploading anything that you don’t require the original for. Keep digital documents safe on an external hard drive.

4. Storage

Storage spaces like closets, attics, basements, and garages wind up with the worst of what we collect over the years. This is where decluttering will really earn you some extra room. Using a similar practice, pick away box by box determining what can be parted with and what hasn’t been used in more than a year. Sometimes things get stored simply because we’ve forgotten what’s inside a box and have no time to check.

5. Knickknacks

Odds and ends pile up in junk drawers, side tables, and bedroom bookshelves without us really noticing. Knickknacks, ornaments, and bits and pieces from this and that never seem to have a space of their own. With “homeless” items, the best practice is to determine what the item is used for, if you still have a use for it, and where it would fit best in your home.

You might be surprised by the number of items you’re happy to part with once the process gets going. Many people don’t like the idea of change, but a fresh start as your clean New Year’s resolution will have you feeling renewed and excited for what’s to come.

Organize Your Cleaning by Day

Trying to tackle an entire apartment in one go feels impossible. Breaking each task down by date and time provides a clear schedule which outlines your pathway toward success. Rather than starting down the barrel of a never-ending chore, you know that Monday is only one hour of cleaning, while Tuesday is two and a half. By Friday you’ll be finished with the upper level and come next Wednesday, your entire New Year’s cleaning schedule will be complete.

Having a visual aid to guide your progress offers motivation and reward. Checking off each step as you complete it encourages you to stick to your clean New Year’s resolution and earn yourself the organized condo you deserve.

Consider Hiring a Maid Service

There are some cleaning tasks which are easy and others which seem downright unmanageable. Don’t stress! This is where companies like ours step in to do the heavy lifting and give you peace of mind and shiny new living quarters. Professional maid services know all the tricks of the trade. From clearing hard to reach spaces to removing ground-in stains.

In a fast-paced world where many of us are holding down full-time jobs, raising families, nurturing relationships, trying to maintain social engagements, and meeting extracurricular expectations, there’s no time to clean.

Once you’ve decluttered and organized your belongings, a maid service will sweep in and scrub your home from top to bottom. This is the perfect way to start the year clean and leave your condo feeling lemony fresh.

For more tips on keeping your new year’s resolution to clean more, call Maid4Condos at 1-647-822-0601 or contact us here.

Seven Cleaning Tips for Busy People

The modern world is a busy place. Trying to incorporate work, family, leisure, friends, and downtime into your life is nearly impossible. Add cleaning to the mix, and it feels like things are on overload. At Maid4Condos, we specialize in maximizing cleaning output while minimizing time wasted. To help our clients save time, we’ve compiled our top seven cleaning tips for busy people.

Seven Cleaning Tips for Busy People

1. Clean by room

Looking to clean a messy house as a whole is daunting and takes an enormous amount of time and patience. Rather than putting all your energy into a hundred tasks, focus on a single room at a time. It helps to prioritize rooms by utilization. The kitchen is a room used multiple times each day. It takes quite a beating from morning to night. Washing dishes, counters, the stove, floors, and organizing the fridge will get this room out of the way so you can move onto the next.

By cleaning rooms one at a time, you ensure that each room is shiny and ready to be lived in before the next room is started.

2. Put Things Away Naturally Throughout the Day

Whether you live in a one-bedroom apartment or a three-storey house, organizing takes time. One way to maximize the time available to spend on housework is by doing things in a natural order. For example, when you find toys that belong in upstairs bedrooms, gather them up and place them in a laundry basket near the base of the staircase. The next time you climb the stairs to shower, gather laundry, or grab a book, bring the basket of toys up with you. This saves you climbing the stairs multiple times a day.

For single-storey units, the same can be done while organizing individual rooms. Rather than running to the trash bin every time you spot a candy wrapper, or the kitchen every time you find a dish, sort things onto a single surface. When you’re finished organizing one room, take the pile to its designated space. This saves time and maximizes focus on a single room at a time.

3. Work at it Day by Day

Cleaning an entire house in one day is tough. Breaking it up and doing a little each day makes the work go by faster and allows you to schedule more than one activity per day. Thirty minutes a day is enough to have your entire house feeling cleaner and more organized by the end of the week. If you keep this process going, cleaning a little bit every day, your house won’t have time to get messy. Of course, there are exceptions to this rule. Toddlers, pets, and guests increase the mess factor and decrease free time to clean. Taking this into consideration, remember it’s okay that your home looks lived in.

4. Tackle Dirt Before Clutter

At Maid4Condos, we regularly get questions about cleaning tips. Busy people need to know that it’s not bad to have a home that looks well-loved. Laundry yet to be folded means everyone has clean clothes, dishes waiting to be cleaned means the family is well-fed, and toys on the floor mean children are at play. The important stuff is ensuring bacteria and germs are eradicated and not tracked through your home.

Before you worry about the clutter in your space, focus on chores that freshen, deodorize, and disinfect. Water and food products are notorious for growing bacteria. So, your kitchen and bathroom are top contenders for these tasks. Even so, don’t forget to spray children’s toys before they’re put away each night, and regularly wash pet bedding and blankets.

5. Store Supplies in Easy to Reach Spaces

It’s never fun to run around the house trying to find cleaning supplies. When you’ve only got an hour to clean, why waste 10 minutes searching for the bucket and mop? Rather than wasting your valuable time on search efforts, store your cleaning supplies in easy to find locations and within range of their intended targets. For example, storing products like Scrubbing Bubbles near the bathroom will make it easier to spray down the tub and shower. Similarly, keep your vacuum on the level with the softest furnishings and carpets.

If you have the option, storing your washing and drying machine near the bedrooms and the bathroom will also save time. Rather than running up and downstairs to gather laundry, wash it, fold it, and climb stairs to put it all away, keep everything in one place and save time and energy.

6. Enlist Your Housemates

Whether you’re a college student with multiple roommates or a homeowner with a spouse and children, you should delegate. When everybody has a chore to do, the work goes much quicker. Rather than taking on every task by yourself, hand out jobs at the beginning of the week. Rotate them, so nobody gets stuck with the dirty jobs every time. A chore chart is also an excellent incentive for children to earn rewards or allowance money.

Even small children can do small chores. You might be surprised to see just how much our children can accomplish when given the encouragement they need. Gathering toys for the toy box and putting away their clothes are both easy tasks to master early.

7. Put Belongings Away as Soon as You’re Finished Using Them

One of the toughest habits to break is putting things away before beginning a new task. It’s something we try to teach our children at every turn, yet somehow, we as adults often still struggle. When you’re finished reading a book and decide it’s time to make dinner, put the book on the bookshelf rather than leaving it on a side table. After you’ve prepared and eaten dinner, wash, dry, and put away dishes rather than letting them sit out.

When we choose to put things away the moment we’re finished, we create less clutter to deal with later. This makes the mess far less overwhelming and saves us time in the long run.

Get More Cleaning Tips for Busy People with Maid4Condos

Looking to save time and create a clean space you can be proud of? Contact Maid4Condos to learn about our many cleaning services. Call us at 1-647-822-0601 or visit us online for a free estimate.