Out of the Box Decluttering Tips for Condo Dwellers

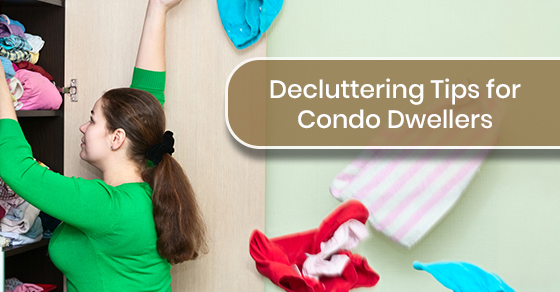
Condo living is not always all it’s cracked up to be. Sometimes that limited space and limited storage can add up to a stressful, disorganized mess that can keep you from enjoying your home.

 Decluttering Tips

So why not take the time to start decluttering your condo and minimizing your belongings? We know the answer to that: It’s too much work! Decluttering is definitely a lot of work, but with a few out of the box decluttering tips, it will be a lot easier than you think! Try these ideas to make decluttering more fun (or at least less scary)!

  1. Baby steps: Don’t feel you have to do this all at once. Take time every day to do something different — something that will just take a few minutes. For example, clear your kitchen counter, clear off a shelf, or clean out a drawer, throw out clothes you know you never wear. This helps to jump-start your decluttering and makes it more manageable. It also shows you how easy it is to start making your condo look organized and spacious.

  2. Giveaways: Give stuff away piece by piece each day. You can slowly reduce your belongings making room for the things you need. If you get into the habit you might get an incentive to do more than one a day and the next thing you know, your home has a little more breathing room!

  3. Start with a trash bag: See if you can fill a single trash bag either right at that moment or gradually as you come across things you don’t need and that won’t be worth giving to charity. If you really don’t have much trash, then make it a charity bag filled with the things you no longer need.

  4. Closet hanger experiment: Oprah introduced this easy technique on one of her shows. It’s simple. Just turn all the hangers in your closet backward. Then if you wear it, put it back in the right way around. After six months you can then give away all the clothes hanging in the wrong direction.

  5. Make a declutter list: Lists are always a satisfying way to manage big jobs. Nothing feels better than crossing something off a list! You can do it by room or by project such as hall closet or junk boxes, and then make your way down the list. The beauty of this is you have a plan, and you can do things one at a time to make it less daunting. You can even add a date beside each task to give yourself goals.

  6. Set target numbers: Choose a manageable number to set targets. If you decide on the number five, for example, you then target five things to throw away, five things to give to charity, and five areas to be neatened. The throwaway and charity parts of this are self-explanatory, however, for the neatening, you want to look for things that need to be put away like the vacuum that’s always in the hall, a coat tossed on the couch, or a pair of scissors on the coffee table.

  7. Don’t know box: Your don’t know box works much like the reverse hangers. Sort through items and anything you don’t know whether you need or not goes in the box. Anything you use in the box over a six month period gets put back in a place where you can find it. At the end of the six months, anything still in the box goes to charity (or is sold if you prefer).

  8. Challenge your needs: If you are really looking at going beyond a declutter and reduce your need for material items, a good approach is to challenge your needs. You can try living without that extra coat for the fall, only wear a smaller selection of your shoes, or try streaming music and movies if you have a massive vinyl or DVD collection. If you can live without the other things, you can give them to charity and also reduce your desire to buy such items in the future.

  9. Question your motives: Another way to overcome your fear of minimizing or decluttering is to question your motives for buying something. Look at items in your home that you use less often, or never use at all and try to remember what motivated you to buy it in the first place. You can use the reverse approach and look at items and consider how someone else would use it, or even how much they might pay for it. This can add a new incentive, which is to sell items you don’t need.

  10. The classic sort: With all these other ideas floating around you might think to yourself, “this is going to take forever.” If this is the case, jump in with the classic sort. You just need four boxes or garbage bags, clearly labeled: garbage, donate, keep, and relocate. Take them into a room and start sorting. You must be unforgiving in the process with everything in the room ending up in one of the boxes.

The bottom line is decluttering and minimizing will provide you with an organized home with more space and less mess. It is the easiest way to create a more livable space in your condo, and provide you with peace of mind. It also feels good to make a little money from the items you sell and even better when you donate items to charity!

If cleaning isn’t your thing, call Maid4Condos at 647-822-0601 or contact us here for more information about to get a spotlessly clean condo without having to lift a finger.

Condo Home Hacks for People Who Have No Time to Clean

That endless need for cleaning your condo can become too much to bear. In fact, not only is the thought of constantly cleaning stressful, but the mess itself can also add to your stress. Don’t despair! You can use these handy hacks to keep your condo clean, even if your schedule (or slight laziness) begs to differ.

 Cleaning Hacks for Busy People

Everything in Its Place

Although this might sound counterproductive, having a place to dump stuff to keep it out of sight and out of mind, at least most of the time, will help keep things looking neat. Finding a place for everything takes some thought up front, but then makes it easier to keep things tidy moving forward.

Get creative and figure out a) what you can use and b) if you need anything to help in your efforts to get organized. It’s as simple as hanging up a few hooks in the hall for your coats and scarves, throwing a bowl on your counter or hall table to toss your keys and phone, and even assigning a special junk drawer for things you can’t even think about right now, but don’t want to lose. Being organized is the best way to keep things neat and allow your mind to feel a little more Zen.

Lightning Fast Laundry

We’re not sure which is worse, doing the laundry or folding it when it’s done. An easy way to eliminate folding from your laundry regime is to keep everything on hangers. This works to save time in two ways:

  1. First, you will not have to do as much ironing as everything will be hanging nice and neat in your closet.

  2. Second, it’s easier to hang than fold because it doesn’t take any thought process to figure out how to fold it best.

Now, if you live in a condo and you’re thinking you don’t have enough space to hang all of your clothes, consider investing in a clothing rack. This will provide you the extra space you need and no one will see it as it will be in your bedroom.

Wipe Out

Maybe one of the best cleaning inventions in the past 10 years is wipes. They make it easy to clean as you go so there really is never the chance for dust, toothpaste, and gunk to build up anywhere. Keep disinfectant wipes in the bathroom, kitchen, and living area and just give things a swipe whenever you do something that needs swiping. It’s quick, easy, and keeps you from having to invest time in a major cleaning. You’re welcome!

Sweep and Swipe Your Way Out

If you are lucky enough to have hardwood, laminate, or tile in your condo, keep a broom and a Swiffer handy. You can do quick sweeps and swipes of your rooms to not only keep things looking dust bunny free but also get a mini work out while you’re at it. If you want, you can even invest in one of those cordless vacuums to get the job done even faster.

Cut It off at the Pass

Just like the wipes can help keep things clean so you never have to waste time on a major clean up, you can use prep cleaning in the bathroom every day. Buy a spray shower cleaner and spray your shower down after each use. It might seem like overkill, but it just takes a few seconds, and you will love yourself for it.

It’s depressing stepping into a filthy tub every morning, and this will help you have a fresh shower every day while avoiding a major scrub down. No mildew, no soap scum, and no elbow grease required. If you have a glass shower stall or doors, hang a window squeegee in the shower and give the walls a quick swipe after you shower.
Declutter

Having less stuff is also the easiest way to keep things neat. Declutter whenever you can. If you spot something you don’t need, toss it in a box or garbage bag and plan to throw it out, or drop it off at Value Village.

And don’t forget things like your coffee table and kitchen counters. Having a recycling bin handy by your front door if room allows is also perfect for junk mail and old newspapers and magazines.
Speed Cleaning

Once you have all of the above techniques down pat, it’s time to learn to speed clean. Because you’ve addressed most of the major cleaning challenges in your condo, speed cleaning will be much easier. Here’s how it works:

  • Grab a garbage bag

  • Choose a room

  • Sweep the room for any signs of garbage and trash them right away

  • Then tidy anything that’s left using your go-to storage spots and containers as you work

  • If you’re in the bedroom, make the bed or replace the sheets

  • Toss dirty clothes in the laundry and if time allows, throw a load in while you’re at it

  • Last but not least, do a swipe of furniture with your wipes and the floors with your broom or Swiffer

Multitask

Let’s face it: if you’re crying “not enough time” as you get out of cleaning free card, but you’re watching TV, you’ve got more time than you think! That said, you don’t have to stop watching TV if you use it as the perfect op to clean as well.

Multitasking makes cleaning easier because you can neaten while you are watching TV, talking on the phone, or listening to a podcast. In fact, you can even do it while you’re on a conference call with work! Another idea is to tackle cleaning while you binge watch to make cleaning seem a little less daunting.

Cleaning is never fun, but if you combine it with another task you enjoy, and make sure you are prepping on a regular basis, you’ll never really have to do a hard cleaning day in your life!

If cleaning isn’t your thing, call Maid4Condos at 647-822-0601 or contact us here for more information about to get a spotlessly clean condo without having to lift a finger.

The Ultimate Cleaning Supplies List

We all hate cleaning, but eventually, that mess will catch up with you. Nothing makes cleaning easier than having the right tools and cleaning products to get the job done right. We’ve put together the ultimate cleaning supplies list for your home, so you always have what you need to tackle any mess. This is also the best shopping list if you are moving into your first apartment or just bought a condo or your first home!

 Cleaning Supplies List

To make it easier to navigate, we’ve broken the list down into the rooms in your home, so you can find the perfect products for every nook and cranny! Shine on!

Kitchen

Your kitchen is the biggest cleaning challenge thanks to greasy buildup from cooking. Here’s what it takes to tackle those big-time kitchen messes:

  • All-purpose cleaner: All-purpose cleaners such as Mr. Clean will cut grease and grime that can build-up on just about any surface in the kitchen. From counters to those disgusting range hoods, and garbage cans to stovetops, this cleaner will cut through food mess and comes in an assortment of pleasing scents. As an added cleaning boost, choose an antibacterial all-purpose cleaner.

  • Glass cleaner: Windex is the king of glass cleaners and can be used on windows, oven windows, and surfaces such as sealed stone countertops.

  • Cleaning cloth: If you want to avoid using cleaning products, you can use a microfiber cloth that works well on its own. However, if you are using cleaning products, choose terry cloth, dish rags, or sponges. Sponges also come with a scrubbing side that works well on the crusty build up.

  • Duster: An extendible duster is perfect as it will allow you to reach high cabinets, ceiling fans, and the top of the fridge.

  • Eco-friendly options: If you are looking for chemical free products you can find many eco-friendly choices including Mrs. Meyer’s and Method. You can also use vinegar and old newspaper as the ultimate natural window cleaner and lemon and baking soda as a natural scrubbing cleaner for crusty surfaces.

TIP: Spray your cleaning product onto the cloth instead of the surface to avoid waste and residue.

Bathroom

The bathroom can share some of the cleansers used in the kitchen, including the window cleaner and all-purpose cleaner, plus these specialty cleaners:

  • Tile cleaner: Nothing gets dirtier than the tile in your shower and tub area. Choose Scrub Free or Scrubbing Bubbles to remove that slimy soap residue without the need to scrub hard.

  • Grout brush: For the grout, you will have to use a grout brush. However, if you use the spray on non-scrub products after each shower, you won’t need to do as much cleaning and scrubbing.

Tip: Before you wash the floors in your bathroom, vacuum to pick up all the hair and lint that collects in the bathroom to avoid just moving it around with your mop or Swiffer.

Bedroom/Living Room

For the bedroom, living room, dens, and office, here’s what we recommend:

  • Water and damp cloth: To keep your furniture, including wood furniture dust free, it just takes a clean cloth slightly dampened to remove dust. Other products such as furniture polish actually act as a magnet for dust.

  • Upholstery cleaners: Your upholstered chairs, couches, and headboards need a little refreshing once a week, and nothing is easier than Febreeze. Just a few sprays and it will help refresh with a wide assortment of fragrances available.

  • Lint roller: If you have pets, their fur is everywhere. We recommend a large lint roller you can run over your upholstered furnishings and even curtains to remove that pet hair easily.

Laundry Room

You can care for your laundry room with the same products you use in the bathroom and kitchen. However, you will need to take care of that front load washing machine and dryer. Here’s what you can use:

  • Washing machine cleaner: Front load washing machines have a rubber seal that can become smelly due to mildew. Both Tide and Clorox make a product made specifically for this purpose which can be run every couple of weeks without laundry to keep things fresh.

  • Dryer: Your dryer requires lint removal after each use, but you also need to remove lint inside the “drum.” A damp clean cloth can do the job perfectly. You should also vacuum the vents regularly.

Floors

We’ve separated floors into their own category by flooring type to make it easier. We recommend that every household has a straw broom and dustpan, an easy to use floor cleaner such as a Swiffer and a sponge mop (more for major spills than cleaning). You can then add these floor specific cleaners:

  • Carpet: Carpet tends to hold onto odors. We recommend a product such as Glade Carpet & Room Deodorizer which you sprinkle on the carpet and then vacuum up. If you are sensitive to fragrances, you can actually just use baking soda and they also make pet specific carpet deodorizers for when your furry friend has an accident.

  • Wood floors: Wood floors require gentle care and the best thing for regular clean up is a microfiber mop. You can actually just use these dry unless you have some kind of spill.

  • Tile: Tile can be cleaned with all-purpose cleaners. However, if you have stained grout you can also use a steam cleaner.

Miscellaneous Cleaning Items

There are always miscellaneous cleaning items that won’t be needed by everyone such as:

  • Stainless steel wipes: These little babies are a must to remove smudges from your stainless-steel appliances.

  • Silver cleaner: If you have any sterling silver items than a good silver cleaner is a must to avoid tarnishing.

  • Antibacterial wipes: Two words – Flu Season

  • Oven cleaner: Most people have self-cleaning ovens now, but if you don’t, or if you have a toaster oven in need of cleaning, an oven cleaner such as Easy Off is a must.

This checklist will provide everything you need for a spic and span home!

If cleaning isn’t your thing, call Maid4Condos at 647-822-0601 or contact us here for more information about to get a spotlessly clean condo without having to lift a finger.

How to Wash a Microfiber Cloth

Most of us hate condo cleaning and all the tasks it takes to keep our homes sparkling clean. Unfortunately, cleaning is a necessary evil you can’t avoid, even if sparkling isn’t on your list of priorities.

 Washing a microfiber cloth

We find that using the right tools can make cleaning faster and easier.

Enter the microfiber cloth. These handy little cleaning tools have replaced the old rags and paper towels used for cleaning by not only households, but cleaning companies alike. They are ideal for cleaning tasks thanks to their special material designed to hook onto dirt and remove it instead of just moving it around like other cloths. However, to keep them effective, you have to make sure you are cleaning and caring for your microfiber cloth properly.

What Is This Miracle Cloth Made Of?

Microfiber cloth uses a scale of fibers so tiny that they are even smaller than a whispery strand of silk. These tiny strands are much smaller than common materials you might find in a cotton cloth. Instead of cotton or cotton blends, the fibers used in a microfiber cloth are made from a blend of polyester and polyamide or nylon which are forms of plastic.

When the fibers used in microfiber cloths are combined, the fibers are split making the cloth more porous than any other cloth you can use. This creates a cloth that is absorbent and collects dirt and even bacteria for quick cleanup.

How does Microfiber Work?

When you clean with rags or paper towels, they actually make clean up harder. Why? Because they push dirt around instead of collecting it and removing it. When you use microfiber cloths, their special combination of plastic blends, tiny strands, and split fibers all work together to gang up on dirt and grime and hook onto it to remove it.

The nature of microfiber also means you can clean more safely because microfiber cloths work better on their own so there is no need for harmful cleaning products. If you’re worried about bacteria, don’t be! The strength of the fibers can even remove bacteria, which means no need for chemicals. All you need is a clean microfiber cloth and if you choose, you can use a little water for more stubborn dirt.

You can also avoid the frustration of having to do an additional swipe with a clean paper towel to pick up that watery, dirty residue left behind by rags and dishtowels. A microfiber cloth doesn’t need the messy water or cleaning products that will leave that cloudy residue behind. With the grit removing split fibers you also won’t see any gross, soggy debris such as crumbs either.

A lot of people will still use detergents with their microfiber cloths because they don’t think it’s possible to remove built-up grime or grease with the cloth alone. However, the polyester used in the cloth works as a magnet for fats and will clean them up easily without too much elbow grease.

Finally, if you do feel the need to use water, the extra absorbency of the microfiber cloth will sop up any liquids without leaving any traces behind. The key to keeping your microfiber cloth working effectively all boils down to how you clean and care for it.

Hand Wash or Machine Wash?

It might seem like using a cleaning cloth that has to be cleaned seems counterproductive. However, like any other cloths, if you use it when it’s dirty you are just adding more bacteria and dirt onto the surface you are trying to clean.

Cleaning your microfiber cloth is recommended after each use to remove all the debris it has collected during the cleaning process. Keeping a few handy in the kitchen is always a good idea so you can replace them when you need them, but because wash up is so easy, you can also get away with having just one.

You can choose to wash your microfiber cloths by hand or use your washing machine. There is an easy mantra to help you remember how to care for your clothes: No heat, no fabric softener, no detergent.

If using a washing machine, you should always run all your microfiber cloths together without any other clothing or linens. The reason for this is that the magnetic effect of the fibers tends to collect tiny pieces of lint that cling to the strands. This then coats the strands stopping them from working properly. Cotton and natural fibers are the worst things to wash your microfiber cloth with, so, if you must throw in other items, make sure they are synthetic.

Because you can’t use heat, always wash your microfiber cloth on a cool or warm setting. Do not use any detergents when running the wash cycle and once they are washed, you can air-dry them or toss them in the dryer at the lowest setting. Do not use any anti-static sheets when you are using the dryer and never iron your microfiber cloth.

When washing them by hand, begin by soaking your cloth in cold or warm water — never use hot water. Once they’ve soaked for a few minutes, you can stir the water with your hand to loosen dirt and debris from the cloth.

Rinse them under the tap to get out any debris that is left behind and then air-dry. You can also throw them in the dryer as mentioned above. We recommend air-drying as it will avoid picking up particles in the dryer as well as keeping it away from heat.

These cleaning tips work for most microfiber cloths, but it’s always best to read the care instructions provided by the manufacturer for the best results. Caring for your microfiber cloth will help them last longer and keep them working hard so you can work less!

If cleaning isn’t your thing, call Maid4Condos at 647-822-0601 or contact us here for more information about to get a spotlessly clean condo without having to lift a finger.

7 Tips for Reducing Dust in Your Condo or Apartment

Why is my condo so dusty?

Condos and apartments are especially prone to dust and dirt. Older buildings that have heaters and air conditioning often result in dry, stale air, and many apartments do not have adequate airflow to deal with this problem. Whether you are looking to do a deep, seasonal clean in your apartment or simply trying to understand how to prevent the build-up of dust and dirt, these seven tips will help keep your apartment clean all year round:

Tips for reducing dust in your condo or apartment

  1. Change Your Bedding on a Weekly Basis

    Dust mites love to hide in your sheets, bedding, and mattress. The longer you go in between washes, the more time they have to accumulate, which can aggravate your allergies and make for an itchy, uncomfortable sleep. Beyond the dust mites, dead skin cells, and hair that find their way into your bedding, you also track dirt and debris into your sheets just from walking around your home. Especially if your floors are dirty or dusty, the amount of debris that can end up in your bed is quite dramatic, making it crucial that you wash your bedding on a weekly basis.

  2. Clean Up the Clutter

    Knick-knacks on your shelves and clutter on your floors act as dust-magnets. They are difficult to clean thoroughly, especially if they are in hard-to-reach places such as high shelves or awkward corners. Dusting these areas on a regular basis can help prevent the build-up of dust, but it is a time-consuming task. Instead, try clearing the clutter from your shelves and floors. Adopting minimalist qualities by cleaning out the clutter and getting rid of unnecessary items means you need to spend less time cleaning them. For the items, you do choose to keep, do your best to decorate your apartment in a way that leaves your knick-knacks and decorative objects accessible – you’ll thank yourself when you don’t have to reach awkwardly to dust that souvenir you picked up on your last vacation.

  3. Choose Tile or Hardwood Flooring

    Although the carpet is soft, comfortable, and decorative, it is a haven for dust particles, bacteria, and other air pollutants. Instead, hardwood flooring, tile, or even less expensive options like laminate flooring are much easier to clean. Not only can you use a broom and dustpan instead of a vacuum cleaner, but you can easily mop to clean up after spills. Carpet is much less versatile, and cleaning significant spills can be an expensive and time-consuming hassle. When you have the option, saying “no” to carpet can save you a lot of money and a lot of headaches. You’ll notice an improvement in the cleanliness of your home almost immediately.

  4. Opt for Area Rugs

    For those who simply love the feel and look of carpet too much to move on from it completely, area rugs are the perfect compromise. You can get virtually any fabric, size, and pattern, allowing you to place rugs in specific areas of your home. Not only do area rugs provide the soft, cozy feel you crave, but you can also roll them up and shake the dust and dirt outside, keeping your home clean. In this way, area rugs are much easier to clean and maintain than traditional carpet. For a complete cleaning, shake out the rug outside and then vacuum it.

  5. Use a Wet Cloth

    Traditional feather dusters and other dusting tools simply move the dust around, rather than actually absorbing the dust and keeping your home clean. Rather than waste your time and energy moving dust around, opt for a wet cloth when dusting your knick-knacks and other belongings. A damp cloth will absorb the dust and dirt, leaving your belongings looking brand new. As well, this prevents dust and debris from simply being stirred up and released into the air. The result is improved air quality and a cleaner home. While there are dusters designer to trap and collect dust, a damp cloth is a convenient (and much cheaper) alternative that is just as effective.

  6. Get an Air Purifier

    Combat dry, dusty, and stale air by getting an air purifier or air filtration system for your home. Air purifiers include air filters and often have pleasant scents that help to mask stale and musty odours. Especially for condos and apartments prone to dust collection, an air purifier can help maintain the air quality in your apartment. Not only will this improve the smell and feel of your condo, but it will also help to prevent respiratory issues with your health. Beyond air purifiers, adding a humidifier or essential oil diffuser can have a similar effect, improving the air quality of your home in just a few hours.

  7. Do a Quick Clean Every Day

    The most important tip for preventing the build-up of dust in your condo or apartment is simply to do a quick clean every day. By wiping down surfaces, sweeping, and dusting on a daily basis, you prevent dust, dirt, and debris from accumulating in high-risk areas. This will help improve the overall quality of the air in your apartment.

Professional Cleaning Services

At Maid4Condos, we understand that many people simply don’t have the time to clean their homes as frequently as they should, to maintain a healthy and tidy living environment. It can be a time-consuming and an exhausting task between busy schedules which is why we’re here to help! We offer customized cleaning services tailored to the needs of our clients, and we are happy to work with you to determine your cleaning needs.

Keeping your apartment or condo dust-free is a unique challenge that requires daily care. These tips will help you prevent the build-up of dust and dirt, improving the cleanliness and air quality of your home. For cleaning jobs that are simply too much to handle on your own, we offer our services on a weekly, bi-weekly, or monthly basis. For more information about our cleaning packages or for a customized quote, call us at 647-822-0601 or contact us here.

6 Tips for Cleaning Your Baking Pans

After spending hours in the kitchen creating a delicious home-cooked meal for your family, the last thing you want to do is scrub messy pots and pans. Unfortunately, if you do not clean them quickly, this task can go from a small inconvenience to a mountain of work. There are countless DIY tips and home remedies for hard-to-clean baking pans, but it is difficult to pinpoint any truly effective practices because of a variety of factors.

Housewife cleaning baking pan in oven

Here are six amazing tips that will help you find the best tools for your unique cleaning needs so you can have your baking pans looking brand new after every meal.

  1. Choose the Right Sponge

    One of the most important tools in your cleaning kit is your sponge collection. Each sponge is designed to clean a different material, so it is important to make sure you have the right tool for the job. For example, for coated, non-stick pans, soft sponges are ideal because they will not scratch the surface of compromise the integrity of the coating. For stainless steel pans, a very fine steel wool should effectively remove cooked-on gunk without scratching the steel. Whether you love cooking on cast-iron pans or prefer pans with a non-stick coating, each material can be best cleaned with a different sponge. Once you have a better idea of the coating on your baking pans, you can research sponge types and experiment with what works best for your cooking style.

  2. Create Your Own Cleaning Mix

    There are countless home recipes and DIY tips for cleaning pots, pans, and baking sheets. Some are simple, like the classic combination of baking soda, vinegar, and salt. When used in the right order, these ingredients create a paste that helps to neutralize odours and loosen cooked-on food and other debris. Beyond this recipe, there are many more secret tips that may be effective in certain situations. Some ideas are more creative than others, while some are simply unbelievable until you try them, such as using ketchup to eliminate cooked-on food and restore the shine of your baking sheets. Many of these creative cleaning solutions are effective – you simply need to find what custom combination works best for your cooking style.

  3. Boil, Don’t Soak

    Letting your dishes soak is a classic cleaning tip that will have you reliving your worst memories of the kitchen at your college dorm. Soaking your pots and pans for long periods of time can make them easier to clean, but it is much more effective to soak them for a short period of time in boiling water and scrub them as soon as the water is cool enough for you to touch it comfortably. Boiling water helps to remove burnt food and other debris from the pan. While soaking it for long periods can help, most of the benefits of this come in the first few minutes while the water is hot, and letting your pots and pans sit for long periods of time shows diminishing returns. For the easiest and most efficient clean, simply add some water to your baking pan, bring it to a boil, and scrub with the proper sponge and cleaning mix.

  4. All-Natural, Organic Soap

    All-natural and organic soaps and cleaning solutions are not just a trend – they are the way of the future. Many people have opted for natural cleaners, especially since our dishes come into direct contact with our food. By using organic solutions, you prevent chemicals and other harmful substances from seeping into your food as you cook. A simple combination of tea tree oil – which is a powerful antibacterial oil – and organic dish soap is strong enough to fight grease and cooked-on food while being made from all-natural ingredients, so you can trust that your dishes are as clean and safe as possible. The benefit to creating your own organic soap is that you can tailor the ingredients to your preferences. Whether you love the smell of tea tree oil or prefer the uncompromising strength of white vinegar, the choice is yours.

  5. If All Else Fails, Use Bleach

    Unfortunately, not every cooking mess can be cleaned with organic ingredients and a little elbow grease. Some stains are simply too strong to fight with natural ingredients. If all else fails, chemical compounds such as bleach, borax, and peroxide are very effective in cleaning stained pots and pans. If cleaned properly and with the necessary safety precautions, using bleach and other chemicals can be a simple, straightforward, and safe process. Although it is not the first choice for many in the kitchen, sometimes it is necessary to tackle tough stains, burnt food, and scorch marks with stronger cleaning solutions.

  6. Use Non-Stick Baking Pans

    Of course, the alternative to complicated cleaning solutions is simply to buy non-stick pans. While these non-stick coatings are often effective, they can be damaged quite easily if not cared for properly. For example, steel wool or other sharp, jagged cleaning objects can scratch and damage the non-stick coating, which will make the pan prone to rust and other damage, as well as more likely to burn your food.

Ultimately, how you clean your baking sheets depends on your cooking style and the material of the pans you use. With a little bit of research and experimentation, you can create effective, organic cleaning solutions tailored to your cleaning needs. At Maid4Condos, we offer exceptional customized cleaning services based on your budget and your schedule.

For more information about our cleaning services, or to receive a quote, call us at 647-822-0601 or contact us here.

5 Tips for Cleaning Your Washing Machine

Your washing machine sees a great deal of dirt and debris over its lifetime. All of the dust, dirt, food stains, and other contaminants that are on your clothes and bedding end up in your washing machine. As a result, it can become infested with mould, mildew, unpleasant odours, which can lead to your clothes not being washed properly because there is too much debris. It is important that you clean your washing machine on a regular basis and perform simple maintenance tasks to improve the lifespan of the appliance. Washing machines are often an expensive investment for households, so it is important that you put in the time and effort to maintain it.

Hand in protective glove carefully cleaning the washing machine.

Why Your Washing Machine Requires Regular Maintenance and Cleaning

Washing machines are especially susceptible to the growth of bacteria, mould, and other pollutants because of the wet, humid environment. Unfortunately, as dirt, grime, and debris build up in your washing machine, they act as a hotbed for mould and mildew. These pollutants can cause unpleasant odours to radiate from your appliance. As well, this grime and mildew can prevent your clothes from being cleaned after each wash cycle. If not cleaned for long periods of time, these pollutants can end up seeping into your garments during wash cycles, which can cause skin irritation and discomfort. In the past, washing machines rarely needed cleaning because of the use of boiling water to clean your clothes. This system would naturally kill bacteria and prevent mould growth because of the boiling water. Now, with a focus on eco-friendly, sustainable lifestyles, cold wash cycles are becoming more popular. While this practice is environmentally-conscious and responsible, it also requires greater effort to maintain your washing machine.

  1. Use Baking Soda and Vinegar to Eliminate Odours

    Most of the common household remedies for cleaning your washing machine includes some kind of combination of baking soda and vinegar. While it may not be the most effective method for cleaning the appliance itself, the combination is very effective in eliminating odours. For bacterial and mould growth that has caused foul smells to radiate from your washing machine or even seep into your clothing, a combination of vinegar and baking soda will neutralize the pollutant and make it easy to scrub away. For top-loading washers, run it on its hottest setting while adding four cups of white vinegar to the load. You can also add one cup of baking soda to create a bubbly concoction that will help combat odours and make it easier to scrub away any grime and mildew that remains after the wash cycle.

  2. Let Your Washer Dry Out After Each Load

    This is more of a maintenance tip, but allowing your washer to dry out completely after each load will prevent the build-up of mould and mildew, which thrive in warm, wet climates. Laundry experts will urge you to leave the door to your washing machine open after your wash cycle to allow it to dry out completely before the next load. This tip is suitable for both front-load and top-load washers. By ensuring the washing machine dries out completely after every wash, you are preventing mould and mildew from growing in your machine. This also makes it easier to wipe down and clean your machine, especially if it is done on a regular basis.

  3. Clean the Door Seal & Detergent Tray

    The door seal and detergent tray are hotbeds for mould and mildew. Residue and debris tend to build up in the door seal of front-loading washers. This problem is magnified in new appliances, as high-efficiency washing machines use less water and often use cold cycles, so your detergents and pollutants do not break down as efficiently. As a result, the sticky detergents and grime from your clothes get stuck to the seal of the door, which can promote mould and mildew growth. Fortunately, with some regular cleaning and maintenance in high-risk areas such as the door seal and detergent tray, you can prevent the accumulation of grime and other pollutants, preventing foul odours from developing in your washer.

  4. Occasionally Wash in Hot Water

    Although it is not the most eco-friendly, sustainable option, washing machines will have a much longer lifespan if you simply use hot water on a regular basis. This does not mean that every load of laundry has to be done with hot water, but frequently scheduled hot water cycles will help kill off any unwanted bacteria and keep your washing machine free of mould, mildew, and other grime. Not only will this help keep your clothes free of bacteria, but it will also prevent foul odours from developing at all. This simple tip could save you a great deal of money in the long-term, as your washing machine will require less maintenance and cleaning and will have an extended lifespan compared to those who only use cold water.

  5. For Deep Cleans, Opt for Bleach

    Finally, if all else fails in your quest to clean your washing machine, try cleaning the appliance with bleach. While many people hesitate to use harsh chemicals in their washing machine for fear that the chemicals will seep into their clothes, the benefits of an occasional deep clean with bleach can outweigh the risks. The buildup of mould, mildew, and other bacteria can cause foul odours to seep into your clothes. While this bacteria is generally harmless, your clothes will not feel fresh or clean, and your washing machine can fall into disrepair if not properly maintained. If you prefer to avoid adding bleach to your clothing, simply run a bleach/hot water cycle through an empty washer to help kill bacteria and clean your appliance.

Keeping your washing machine clean can be a difficult task. For those who are having difficulty solving this problem, Maid4Condos is here to help. Our experienced, professional cleaners have an innate knowledge of cleaning large home appliances, so we can help make your washing machine work like it is brand new.

For a quote for our cleaning packages, or to speak with a cleaning professional, call us at 647-822-0601 or contact us here.

How to Clean Your Condo When You Move Out

Packing up all your belongings for a move and getting them to the new location is a big job, but don’t forget what you leave behind. Cleaning up your condo for moving out is the respectful thing to do. It leaves the unit ready for the new occupant to move in with minimal headache, and it can also help you get organized for your own transition. What’s more, failing to leave your condo clean and in good condition for the next occupant could leave you on the hook for the cost of cleaning services.

condo cleaning when moving out

It can be overwhelming to do a top-to-bottom cleaning job on your condo, so it’s handy to have a comprehensive checklist. Follow our guide on where to start, how to clean each room and what products you’ll need for the job. By taking care to do a quality clean on your condo you’ll be assured you’ll receive your security deposit back as well as a glowing reference from your landlord. You might even find those knick knacks that seemingly disappeared out of your life had actually fallen behind the stove!

  1. Start In The Kitchen

    Your kitchen probably has the heaviest grime on its surfaces, so it’s best to start in this area while you’re full of energy and enthusiasm. Begin by cleaning the stove.

    You can purchase sprayable oven cleaner specially formulated for removing the charred carbon, or use a DIY solution of 100g of baking soda in 1 litre of water. Place an old newspaper down below the oven door to catch any drips of the cleaning solution. Apply your cleaner all over the oven including the tops, sides, broiler grate and racks. If you are using the baking soda solution then let it sit for half an hour to loosen the baked matter and use an ice scraper to remove it.

    For the stovetop, use a cleaner specially formulated to remove grease and caked on matter, and then scrub away with the abrasive side of a sponge. For stubborn spots, let the cleaner sit on top for half an hour and try again. Be careful not to scratch your stovetop with overzealous scrubbing.

    To clean your dishwasher remove the bottom rack and use your hands to clean away any gunk in the drain. Place half a cup of white vinegar in a glass and sit it on the top cleaning rack. Run a cycle to clean and disinfect the whole appliance.

    Vinegar is a terrific natural cleaner for all your kitchen surfaces such as countertops and the insides of cupboards. Take an empty spray bottle and fill it with one part vinegar and three parts water. Spray it all over your kitchen surfaces and use a lint-free rag to wipe it up. You can also clean the inside of your microwave with this technique.

    You’ll need to unplug your refrigerator and wipe out the shelves and drawers. Your vinegar solution will work well for this task, or you can remove the shelves and wash them in the sink. Allow your freezer to defrost and mop up any water with a towel.

    Finally, clean out your kitchen sink with a powdered cleaner and a damp sponge. Scrub into the metal to remove subtle buildup of food debris until the true shine of your sink shows through.

  2. The Bathroom

    Start with a high level clean of the countertops, walls and floor with a sprayable cleaner and a textured rag. Remove all the water and soap splatter left behind from habitual bathroom use so that the tile and ceramic are in new condition. Don’t forget the walls and ceiling.

    For the shower and bathtub use a cleaning powder and the coarse side of a sponge. Work into the porcelain and tiles, adding a bit of water to help lift off grime. Pour a chemical drain cleaner down the drain to ensure it is totally clear of hair, soap and groat.

    Scrub the toilet with a cleaner and brush and wipe down the outer surfaces with a cloth and cleaning solution. Flush when finished.

    Pay attention to bathroom vanities by cleaning them out with a cloth and sprayable cleaner. Use paper towel and glass cleaner (or vinegar) to wipe off your mirror.

  3. Bedrooms and Common Areas

    With all the furniture gone there should be less work to do in these rooms, so it’s nice to save the easiest work for last. Clean any windows with glass cleaner and paper towel, wash the walls and check to make sure any sliding doors are still in good working order.

  4. Finish With Floors

    Finish with the floors, otherwise you’ll get them dirty all over again while cleaning the rooms. Sweep thoroughly, moving your appliances from their original positions to ensure you get every inch of floor. Finish with a mop of hot water and floor cleaner to remove any streaks and footprints.

    And with that, your condo should be ready to pass on to the next tenant. Your landlord will surely appreciate your hard effort in cleaning your condo, and you’ll be ensured a good reference and return of your security deposit. Avoid drama while you’re moving out by leaving your condo the way it was given to you, generating some good karma in the process.

    Maid4Condos is a condo-cleaning service located in the Greater Toronto Area that offers master-class trained, secured and bonded cleaning wizards. We clean your home so you don’t have to worry about the nitty-gritty jobs that take up time and distract you from what you’d rather be doing. Having a clean home is essential for maintaining those butterflies you felt when you saw it for the first time. Call us at 647-822-0601 or visit contact us here.


Condo Cleaning Tips: How to Clean Walls

Next up in our condo cleaning survival guide series is how to clean your walls until they shine like new. Condo walls don’t get much attention since they typically don’t get as dirty as floors, linen and appliances. When they do get dirty, however, they greatly affect how the condo looks as a whole. Dirty walls give away an occupant’s lack of attention to detail and suggest some pretty unhygienic habits. Cleaning walls can be a hassle since using the wrong cleaning products can leave telltale streaks, exacerbating the problem rather than fixing it.

cleaning condo walls

If you’re looking to spruce up your condo before selling, or you just want that fresh and new feeling to enjoy yourself, learning how to clean the walls is a great skill that will make your home look and feel a thousand times better. Here are some tips on how to remove splatter, fingerprints and scuff marks from your wall so nobody’s the wiser:

  • Wall washing can help extend the life of your paint job, so make sure to wash them regularly. Twice a year is perfect, preferably in the spring and fall to coincide with routine seasonal cleaning.

  • Crack a window open to speed the drying process. It will also help dispel the smell of cleaners and chemicals from your condo.

  • Remove all art from your walls, and anything else hanging on them. Having an empty canvas to wash is important so you’re not breaking up your workflow by constantly taking items down and replacing them.

  • Lay a blanket or drop cloth on the floor to catch any dirty, debris and water that rolls off your walls. This will make cleanup way easier.

  • Dust your walls and baseboards. Cover a broom with a towel and use the extended reach to wipe down every nook and cranny, getting into hard to reach areas that tend to collect cobwebs. You can attach a vacuum hose to a broomstick to tackle especially dusty spots.

  • Fill a bucket with warm water and soap. Avoid using dyed soaps that will stain your walls. If possible, opt for natural soaps without harmful chemicals that will strain the environment. These soaps will also be safer for you to inhale as you work.

  • Wash your walls with the warm soapy water using a lint free washcloth or a plain sponge. Sea foam sponges are a great option. They’re not dyed so they won’t leave any tint on your walls, and they’re soft and gentle on hands (although it’s a good idea to wear rubber gloves if you’ll be repeatedly dipping your hands into hot water).

  • Empty out your bucket and fill it with clean water. Either wring out your cloth thoroughly or grab an unused one. Use the new cloth and water to give your walls another wipe down, removing all traces of soap and dirt.

  • Allow your walls to dry. An open window will help speed the drying process and help soap smells dissipate faster.

  • Gather your drop cloth and launder it.

  • Rehang art on the walls and put furniture back in their original positions.

You’re all done! You have bright, clean, scuff-free walls to last you until your next cleaning session.

You can keep maintain your cleaning job throughout the year by dusting your walls every so often using a lint-free rag. Swiffer dusters also work well, and clearly show you just how much dirt has been collected on it’s light-coloured material.

If you live in an older condo with textured walls, use an old sock to clean them instead of a rag. The fabric is softer and forgiving, and moulds itself more naturally to the crevices of the wall than a standard rag.

Remember to be careful of your paintings, furniture and electronics while you’re cleaning. In a small space, wielding a broom can be dangerous if you’re not spatially aware of how long it extends forwards and backwards. Don’t accidentally take your television out with some overzealous cleaning.

Cleaning your condo walls is a great way to breathe new life into your home and make it look like you just moved in. Grease spots, dirty fingerprints and an amassment of dust make walls look dingy and ages your space drastically. Not only do dirty walls look bad, they can exacerbate allergies if you’re sensitive to dust and spores. Incorporate wall washing into your seasonal cleaning regimen and you’ll see the amazing difference in the look and feel of your condo. Clean walls are a satisfying reward for a slight bit of elbow grease that takes only a few tools to complete.

Maid4Condos is a condo-cleaning service located in the Greater Toronto Area that offers master-class trained, secured and bonded cleaning wizards. We clean your home so you don’t have to worry about the nitty-gritty jobs that take up time and distract you from what you’d rather be doing. Having a clean home is essential for maintaining those butterflies you felt when you saw it for the first time. Call us at 647-822-0601 or contact us here.

Condo Cleaning Tips: How to Clear Clutter

Do you have several boxes of junk just sitting around your condo? Well, they won’t get rid of themselves and unless you want the Hoarders tv crew knocking on your door you’ll likely want to clear the clutter as soon as humanly possible. In fact, clutter can not only cost you money down the line but can also cause mental issues, such as stress and depression. The good news is that you can get rid of that pesky clutter in record time. Below are a few condo cleaning tips that are light on effort and easy on the wallet.

cleaning condo clutter


Work Backwards

Assuming you have homeowners insurance, think of the first few items that you’d replace in the event that you lost everything in your condo due to a fire or a natural disaster. Perhaps you lived in a big home before and due to your children moving out you’ve decided to move to a smaller domicile, such as a small condo. In such an event, sacrifices have to be made and you can only fit so much into a smaller space. Also, avoid the mindset of trying to determine what to leave behind based on a what to keep/donate mindset.

Instead, create a blank slate, and do so away from your new condo, like at a library or cafe. Take the time to really contemplate and make an effective list on your laptop. Furthermore, try to avoid the pitfalls of being overwhelmed by specific items or model numbers. Instead, write down all of the products that you would go out and purchase for a second time in the event of a natural disaster. If you’re having trouble then there are a few apps that can help you out, such as Stuffsafe and Know your Stuff. Just remember that the items you jot down should be items that are truly valuable to you, either for their practical or sentimental value. Everything else is just extra—stuff you don’t truly need.

Its a Sprint, Not a Marathon

The first thing to realize is that Rome wasn’t built in a day. Trying to clean your entire condo in a day is not a realistic goal. Instead, take the time to devise an effective plan. Pinpoint the exact areas that you will declutter and organize over an extended period of time; keeping a list of items you can cross off may help with this task. The next step is to remain dedicated to the end goal, by sticking to the plan without exhausting yourself.

For instance, try, if you can, to take just half and hour out of your busy schedule to perform some much needed decluttering. Also, tackle just one room during that burst session in order to avoid overwhelming yourself. Perhaps to maximize time management you can use your weekends to get more work done. For instance, take a Sunday off and spend some time decluttering your home office, then take a break, work for another 30 minutes and take another break. In sum, by setting a timer and abiding to it, you should be able to avoid the unpleasant emotions and tension that are often involved in deciding what to throw away, keep, or give away to charity.

Utility First, Sentimental Second

We would be lying if we suggested that getting attached to things wasn’t a possibility. In reality, it can be quite easy to get attached to multiple things around your condo, either because of some sentimental value they possess, or because they remind you of the sweat, blood and tears that you had to expend in order to save up enough money to purchase them. Whatever the reason may be, the most effective way to declutter your condo is to try and set those feelings aside for a few moments.

Instead, focus on the pragmatic use of each item in order to decide what to keep and what to get rid of or donate. In other words, how useful is the item in the real world? Does it have a singular purpose or is it a multifaceted tool? What makes it stand out amongst your plethora of possessions? The next step is to compare it to other similar items you own. Do you have products that perform tasks just as well or better? In other words, pick the product that will add more real life value to your everyday life.

The final step is to determine if the item in question has any sentimental value to you. With gadgets, tools and appliances it it fairly easy to determine their worth based on their practical value or applications. However, when it comes to family photo albums, family heirlooms and other such items, their sentimental value will likely come to the forefront. Now, please note that we are not undercutting the sentimental value of your precious family items. Instead, we are merely suggesting that you avoid being overwhelmed by how an item makes you feel vis-a-vis how much space it occupies and its practical merits.

The Four Box MO

Don’t be intimidated by the fancy lingo. The four box method is just a modified version of the aforementioned cleaning trifecta of keep, donate and throw. Here, we make one addition: store.

The keep box will be used to house items that you use on a regular basis, assuming that you also have actual space for those useful items. The second box will be reserved for items that you plan on either selling at a garage sale or that you’ll be donating to goodwill. The third box is your trash box, essentially a box reserved for papers that need to be shredded or other items that you know you will never be able to fix. The final box is your storage box. This box is set aside for items that you don’t plan on using everyday, or every week but instead are seasonal (such as holiday decorations) or have sentimental value to you. This box should be used to only store items that you actually have sufficient space for storing. In sum, the four box method should help declutter your condo with minimal effort and cost.

If you need an expert’s touch in cleaning and organizing your condo, call Maid4Condos at 647-822-0601 or visit contact us here.