Here’s How Hiring a Cleaner Can Make You Happy!

The truth is, for the busy, modern homeowner, there’s no chore wheel big or flexible enough that allows you to enjoy the dream house you fell in love with and keep up with its maintenance requirements. 

Here's How Hiring a Cleaner Can Make You Happy!

So what do you do? It’s not healthy to live in perpetual dust, dirt, and piles of laundry either — and you certainly can’t do it alone. The last thing you need is to lose your entire weekend to never-ending cleaning and chores, so much that you don’t even get to enjoy the lifestyle perks you worked so hard to save up for.

Sometimes, all you need is a helping hand with condo cleaning services. And before you fret, it’s not a luxury reserved for the rich. Think of it as an investment in your happiness and wellness, so you can finally live the way you deserve: in a clean and healthy home. Here’s how a condo cleaner holds the key to your long-lasting health and happiness at home:

No More Lost Weekends

We can all agree that after the nine-to-five grind on Mondays to Fridays, our weekends are sacred: these two short days give us back precious winks of sleep and rest. The last thing you need is to lose your weekend to taxing chores and more work. 

With condo cleaning services, you can enjoy your weekend as you deserve and relax in the home you worked so hard to save up for. Rather than spend these precious two days cleaning, you now have time for other errands and hobbies, while your house gets the cleaning and upkeep it needs.

Work Out a Regular Cleaning Schedule

When do you even find time to clean — and when was the last time you did a deep clean of your home? It’s natural to feel guilty about this, but many homeowners feel even guiltier at the thought of hiring someone to do it. But condo cleaning services aren’t a luxury: they’re an investment in your health and comfort — and your home.

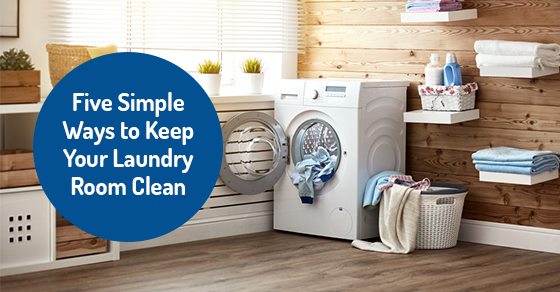
With regular condo cleaning services, you’re guaranteed a thorough, regular cleaning of your entire home. That means the bathroom is cleaned regularly, the dishes are stored properly, the shelves are dusted, and the floors are mopped at least once a week. Condo cleaning services allow you to get a handle on your home’s regular upkeep, so it’s perfectly clean, vibrant, and conducive to your rest and wellness.

Do What You Do Best

Many of us can barely keep up with our busy schedules, let alone carve out time for ourselves. Even then, we often feel guilty for stopping to breathe and recharge — and even more remorseful at the thought of asking for some much-needed help. But the truth is, none of us can do it alone.

Hiring outside help may have been a luxury reserved for the rich and pampered, but that’s all history. Today, condo cleaning services are specially designed for the modern homeowner’s schedule, lifestyle, and budget. You shouldn’t feel guilty for turning to outside help to keep your home in order; in fact, it’s a smart investment in your overall comfort, wellness, and productivity. 

Without an endless list of chores on your to-do list, you now have time to focus on what you do best: work, childcare, hobbies, and other activities that require your attention or enrich your life while making sure that your living space is looked after. 

Think of how much more productive and present you can be, whether it’s at your job doing what you love or in your family and community cultivating relationships that matter. Suddenly, you have a lot more energy to do your best because your living space — and its sacred, refreshing peace — is cared for by the pros.

Nourish Your Mental Health

The hustle and bustle of your career, relationships, and even only life in the city can all take a toll on you. Your home is where you should be at your most relaxed and peaceful, but it’s hard to find comfort amidst the clutter, dust, grime, and even allergens. With all the stress you deal with daily, you deserve to come home to a place where you can truly unwind and relax without worrying about another chore.

Condo cleaning services help restore balance and peace in your life, starting by decluttering your living space and transforming how you live. A clean, organized, and vibrant home is key to your mental health, so it’s important to invest in its regular upkeep to reap these benefits.

Eat, Sleep, and Live Better

What do eating and sleeping have to do with a clean home, you ask? A lot! Think of where and how you prepare your food, the bed you sleep on to re-energize, and the space you rest and relax in: are they clean and safe? 

The risk of an allergic reaction or an illness disrupting your routine is often high outdoors — and the effects of missed work and events and a prolonged recovery costly. But what if it was your own home that made you sick?

A regular condo cleaning service covers these basics to help take care of your health. When you eat, sleep, and work in a tidy space, you’re a lot less likely to be exposed to allergens like pollen, mould, pet dander, and dust mites, as well as toxins and other chemicals and disease-causing germs.  Trust a professional condo cleaning service to deep clean your home and create a safe living space conducive to your busy lifestyle and wellness.

To learn more about how hiring a condo cleaning service can make you happier, call Maid4Condos at 647-822-0601, or contact us here.

Five Simple Ways to Keep Your Laundry Room Clean

The laundry room is where you go to clean anywhere from stained clothes and dusty linens to long-overdue sheets, covers, and towels. With all the time you spend in this room cleaning everything else to get your house — and life — in order, when do you get the time to clean this space? All the dirt and grime washed away from clean, fresh-smelling clothes and sheets also need to be cleaned up — and a clean laundry room is the key to clean laundry.

Five Simple Ways to Keep Your Laundry Room Clean

But when was the last time you cleaned the laundry room? When you head down there, you’re carrying baskets of dirty clothes that need to be washed, dried, and folded. By the time that you’re done, you barely have time to look at the mess left behind, let alone think to clean up — and the cycle goes on for the next batch of clothes and essentials you wash. So, how clean will your freshly washed clothes really be?

Get your freshly washed clothes cleaner for longer. Check out these simple tips for keeping your laundry room — and every batch of laundry — clean and fresh as you deserve:

Tips for Keeping a Clean Laundry Room

1. Clean lightly with each use

Many homeowners book home cleaning services when they can’t get a handle on the mess anymore, especially in areas like the laundry room, where they already dump a lot of dirty items waiting to be cleaned. But professional cleaners show that it’s easier to stay on top of chores when you do a little bit of cleaning every time.

Start by devoting a few extra minutes to tidying up the laundry room every time to keep the space cleaner and healthier with every use. It’s not an extra chore on top of the piles of laundry you’re already scrambling to keep up with just so you have freshly washed clothes to wear, but a genius hack to keep the mess from piling up. 

Make it a habit to wipe down shelves with a wet rag, and clean up stray splashes of detergent to keep them from getting sticky and attracting lint and dust. Then, wipe down the exteriors with a soft microfibre cloth and glass cleaner to preserve their shine. The best part is, you can do this while waiting for a load to finish washing.

2. Clean the dryer lint trap

Over time, lint accumulates in the dryer lint trap. But when you’re always rushing to load clothes in and take them out to fold and store, you end up forgetting to pay attention to the dryer itself. However, you will want to keep the dryer lint trap clean because it comes in contact with freshly washed and dried clothes to prevent them from getting dirty even before you get the chance to wear them again. A dirty lint trap is also a serious fire hazard.

Here’s how the pros of home cleaning services do it: start by gathering lint in the dryer lint trap, then remove the tray for thorough cleaning. Soak it in a mixture of hot water and dish soap, and scrub it lightly to remove accumulated lint. Dry the lint trap in time for your next laundry day, and vacuum the remaining lint.

3. Keep the floors clean

Think of the floors as the catch basin of your entire home — all the dirt you track indoors and the spills from food and drinks accumulate throughout long, busy days. And no room in your home is safe, especially the laundry room where dirty clothes pile up along with lint, detergent spills, and grime. 

The last thing you want is to drop bright, freshly washed whites onto a dirty floor, so make sure to keep them clean. Even basic home cleaning services include sweeping and mopping the laundry room floors regularly and vacuuming the washer and dryer area to keep every load clean and fresh.

4. Organize the laundry room and your laundry

A lot of people dread laundry day because of the mountain of clothes they have to wash. The most common culprit? A messy, disorganized laundry room makes it hard to locate the detergent, bleach, and dryer sheets and store freshly washed clothes afterwards.

One of the long-lasting ways to keep laundry rooms clean is by organizing the space. Start by adding shelves above the washing machine to store laundry products and discard items that you no longer need or use. Make sure that similar things are stored in one area to make them easier to find.

For other laundry essentials like the ironing board and hangers, make sure that these are properly stored when not in use to free up working space. Install hooks or a retractable drying line to hang clothes that wrinkle easily or aren’t safe for dryer use to allow them to air-dry. Finally, make it a habit to organize your laundry — use separate baskets for different types to make loading a breeze, and prevent mishaps like discolouration and shrinkage.

5. Hire a home cleaning service to clean appliances

It sounds daunting to clean the washing machine and dryer on your own, mainly because they are built with multiple parts, including knobs, detergent trays, the wash drum, and the dryer exhaust hose. 

For more simple tips to help you keep your laundry room clean, call Maid4Condos at 647-822-0601, or contact us here.

12 Ways to Reduce Allergies in Your House by Cleaning

Living with allergies or asthma can make it difficult to breathe easy, even when you are at home. This is because there are many allergens in your home that can be irritating to your respiratory system. 

12 Ways to Reduce Allergies in Your House by Cleaning

As a result, if you don’t stick to a strict cleaning regime, you can be adding to your own misery. The good news is you can adopt a weekly cleaning schedule or a professional home cleaning service designed to reduce common irritants that can worsen your allergy and asthma symptoms. Here are 12 ways to reduce allergies in your home by cleaning.

1. Use the right tools 

First, investing in the best tools for the job can make a huge difference in capturing allergens in your home:

  • Vacuum with a fine-particle HEPA filter vacuum, or double bag your existing vacuum to capture allergens.
  • Use washable microfiber cleaning cloths and mops to capture dust.
  • Use disposable synthetic dusting wipes and wands that use static to hold onto the dust instead of moving it around or releasing it into the air.
  • Use dye-free, unscented laundry products to reduce skin irritation or that have scents that can cause your allergy symptoms to worsen. 

2. Use the right personal protection equipment 

Wear a disposable or washable mask and cotton-lined rubber gloves, so you are less likely to trigger allergy symptoms while cleaning.

3. Avoid irritating cleaning products   

Use allergy-friendly cleaning products and avoid any containing:

  • Ammonia
  • D-limonene
  • Formaldehyde
  • Sodium hypochlorite
  • Sodium lauryl sulphate

If you aren’t sure, be sure to read the labels to look for these irritants.

4. Make your own cleaners 

Use homemade cleaning solutions with a mix of distilled white vinegar or lemon with baking soda as a natural scrubber. Vinegar on its own is also excellent for cleaning surfaces like glass and mirrors.

5. Control your environment

Keep your home as allergy-free as possible by controlling your environment:

  • Keep your home thermostat set between 20˚C and 22˚C and a humidity level of no more than 50% to kill off dust mites.
  • Remove clutter from shelves and tables that can act as dust magnets.
  • Don’t smoke or allow smoking anywhere within the home.

If you have pet allergies, avoid having them in the home, or if you can’t do without the little critters, bathe them at least weekly and wash their bedding.

6. Clean bedding

Your sheets, pillowcases, and blankets need to be laundered in hot water weekly. Tumble dry instead of hanging dry as this can attract more allergens to your bedding. Don’t forget your pillows, which should be done at least once a month.

7. Dust weekly

Dust every room in the house weekly. Always start at the top of the room, including wiping away cobwebs, light fixtures, ceiling fans, and working your way down. This ensures you aren’t just moving the dust around.

8. Wash curtains and blinds

These are big dust and allergen collectors. Dust blinds weekly if possible, and choose curtains that can be thrown in the washer and dryer at least once a month. If you have drapes that can’t be washed, vacuum them down weekly.

9. Vacuum weekly

A thorough vacuuming every week keeps the dust to a minimum. You might want to do it more often if you have pets. If you have hardwood, sweep daily, using a static dry mop to attract dust, hair, dander, etc.

10. Reduce mould and mildew

Your bathroom and kitchen offer the perfect environment for mould and mildew growth. These are terrible allergy irritants that need some strict cleaning to reduce growth. Unfortunately, it takes harsh cleansers with chlorine bleach, hydrogen peroxide, or other chemicals to get rid of these irritants, so wear your gloves and mask. 

Keep the fan on or open a window to keep the area well ventilated, and leave it on for at least an hour once you are done cleaning. It will often take some scrubbing to get rid of the mould and mildew. However, if you then spray your shower and bath area with a scrub free mould and mildew remover, you can keep growth at bay. Make sure you turn on the fan or crack open the window when showering or bathing to stop development.

Bonus Tip: If you have plants, cover the soil with rocks to reduce mould growth risk.

11. Clean entryway

You can easily track lots of dirt when walking in from your condo hallway. To reduce the amount of dirt you bring into your home, be extra diligent in cleaning your entryway. Use a mat to wipe your feet and vacuum it daily if you can. Also, always remove your shoes and keep them inside a closet, if possible, to reduce the spread of dust and other allergens.

12. Clean Window Sills

If you tend to open your windows often, be sure to clean your window sills each week. This removes pollen that can come in through the screens.

For more information about reducing allergies in your house by cleaning, call Maid4Condos at (647) 822-0601 or contact us here.

What High Contact Surfaces Should You Be Cleaning in Your House?

With the coronavirus looking like it has no intention of going away any time soon, many families are ramping up their cleaning. It’s essential to reduce the risk of catching COVID-19, yet, how do you know if you are cleaning your home with the right cleaning products, or cleaning all the surfaces that can put you at risk? 

What High Contact Surfaces Should You Be Cleaning in Your House?

Health experts warn that we should be wiping down “high contact surfaces,” but how do you know which surfaces to clean? To help keep you safe, these COVID-19 cleaning tips list the most common high contact surfaces likely to spread germs. Here’s what surfaces you should be cleaning frequently. 

High Contact Surfaces

These are the high contact surfaces in your home:

1. Phones

Wipe down your landline phone at least once a day and your cell phone whenever you have touched other surfaces that could be germy.

2. TVs

With everyone home for longer periods, watching TV is a popular pastime. Be sure you are wiping remotes down often, and don’t forget any gaming equipment as well.

3. Bathroom surfaces

Surfaces in the bathroom, including the toilet seat, toilet handles, light switches, faucets, and doorknobs, are touched all the time. Put a roll of paper towels in the bathroom and stop sharing towels for the duration of the pandemic. Or if you can’t find paper towels in stock, have everyone use their own towel and wash them frequently.

4. Tables

All the tables in the home should be wiped down following meals and following working or playing at the table. Keep wipes in the center of the table so you remember.

5. Computers

Especially when people share a computer, keeping the mouse and keyboard wiped fresh after each use will reduce the spread of germs. For touch screens, be sure to follow the manufacturer’s instructions.

6. Toys

If your kids’ stuffed toys are washable, toss them in the laundry at least once a week, but preferably every few days. If you aren’t sure, try placing them in the dryer for a few minutes to help kill germs. Dishwasher safe toys can be cleaned every day, and all others should be wiped down with safe disinfectant. Follow instructions to avoid using dangerous cleaners your kids shouldn’t touch.

7. Linens

Sheets, blankets, and towels should be laundered at least once a week. When doing the laundry, be sure to wash your hands after handling the dirty clothes and linens.

8. Doorknobs

Front doors are the worst for germs, so be sure to wipe them a few times a day. As mentioned, bathroom doors are a must, but any door knobs for rooms where the doors are opened and closed by family members should be wiped down at least once a day.

9. Light switches

Wipe down light switches that are used frequently by family members.

10. Kitchen

Any surfaces in the kitchen shared by family, such as kettles, fridge handles, cupboard handles, toasters, oven knobs and handles, should also be wiped down twice daily or more.

And don’t forget hand washing before and after touching these surfaces!

What Products to Use

To ensure you are not just wiping, but instead, you are disinfecting, be sure you are using cleaners that target and kill germs and viruses. Disposable disinfectant wipes are the best choice, with disinfecting sprays with disposable paper towels the second best. Avoid using reusable cloths or sponges when disinfecting surfaces. 

Professional Cleaning Services

If you want to know you are safe and are killing the coronavirus, you can hire our team’s GermBlasters service. We use a highly effective yet safe cleaner to target germs, including COVID-19. Our safe cleaning process ensures the germs are killed, but your surfaces are still safe to touch. 

When cleaning yourself, it is possible to leave traces of dangerous chemicals on the surface that can be touched by your family and pets. To avoid contact with such chemicals, we use a safe GermBlasters Solution.

EPA and Health Canada Approved

Our GermBlasters services use cleaners approved by the EPA and Health Canada as an effective solution to fight COVID-19 and other common infections. This is a customized disinfecting process that targets germs at the molecular level. What does this mean? It means we kill germs and bacteria before they can multiply. 

House Disinfecting and Sanitizing Service 

When you use our GermBlasters Solution, our team enters your home wearing personal protective equipment (PPE) for added prevention. This ensures our team does not spread any germs in your home when providing our cleaning services

Not only do we attack germs on surfaces, but also the air in your home. Your family’s risk for contracting germs such as the common flu and colds, but also superbugs like COVID-19 is significantly reduced.

What is GermBlasters?

GermBlasters disinfecting method uses electrostatic spraying technology to deliver our hospital-grade disinfectant. Not only does it provide a highly efficient surface cleaning, but it also offers airborne coverage. 

As a result, even the hardest to reach areas of your home are targeted. Because other cleaning companies look at just the surfaces, they aren’t attacking all the germs you are exposed to in your home. 

Our unique solution and disinfecting process kills all germs in our path, reducing the number of germs loosened and sent into the air on soft surfaces such as your couch. Because our solution evaporates within minutes, contaminants are removed from your environment, but there is no harmful residue left behind.

Why use GermBlasters?

As mentioned, we use an EPA and Health Canada approved solution that is a registered hospital disinfectant. That means you are getting more for your money as we are attacking just about every harmful element in your home, including germs, mould and mildew. Your air is more comfortable to breathe, and everything is left safe while smelling fresh and clean. 

While this might sound like a cleaning solution that is also tough on your family, it is non-irritating to the skin and completely safe. The disinfecting solution is tough on germs but gentle on surfaces, as it is NSF-certified. That means it does not need to be rinsed off, and you can safely prepare food on surfaces treated with our cleaner.  

What are the benefits of GermBlasters?

Our GermBlasters disinfecting service offers many benefits, including: 

  • EPA registered hospital disinfectant proven to kill a wide range of viruses and bacteria
  • Won’t mutate bugs to create a more potent virus
  • Doesn’t contain volatile organic compounds (VOCs)
  • No rinse required
  • 99.999% sanitization on food contact surfaces
  • Odourless and tasteless
  • Kills common food preparation bacteria including E-Coli, Salmonella and Listeria in less than 60 seconds
  • Mould and mildew killer that also prevents spores from forming for up to seven months
  • Safe on a wide range of high-volume touchpoint surfaces
  • Eliminates allergens including dust mites and pet dander
  • Safe on pet bedding, sleeping areas and kennels
  • Eliminates odours
  • Effectively cleans HVAC and Air Ducts for antimicrobial control
  • Can sanitize soft surfaces while also removing odours
  • 100% Biodegradable
  • No aquatic toxicity
  • No Carcinogens, Mutagens or Reproductive Toxicants

To learn more about the high contact surfaces you should be cleaning in your home, call Maid4Condos at (647) 822-0601 or contact us here.

Your Guide to Living Room Cleaning

Cleaning your living room is a pain, but it is a must if you want to maintain a Zen-like calm at home. Mess and even slight untidiness can dampen your mood. With a clean living room, you can enjoy your home and feel less stressed. 

Your Guide to Living Room Cleaning

Disorder and clutter in the home create disorder and clutter in your mind, making it difficult to concentrate or relax. However, with these living room cleaningtips, you can create a neat and tidy environment that keeps you happier. You will also find it easier to maintain the clean then once you get the intense clean out of the way!

What You’ll Need to Clean Your Living Room

Make sure you have the tools of the trade to make the job easier, including:

  • Dust mop 
  • Step-ladder to reach high places
  • Cleaning cloths
  • Small bucket 
  • Sponge
  • Vacuum preferably with attachments
  • Gentle cleanser products
  • Linen deodorizer
  • Furniture polish (optional)
  • Glass cleaner

Quickly Tidy

Clear up all the clutter, such as dirty dishes and coffee mugs, magazines, and paperwork to neaten things up. That leaves your surfaces clean, so you can start dusting.

Dust

Dust starts with the ceiling and makes its way down. Use a broom to reach cobwebs along the ceiling line, and don’t forget those high up vents. Make your way down to the baseboards, and you’ll be amazed at what a difference it makes. You also want to lightly dust pictures hanging on the wall, knick-knack shelves, and all surfaces. Don’t forget light fixtures and ceiling fans. Remove books from shelves to get all the dust cleared.

Clean Glass

Glass furniture is popular in condos, and it can start to look dirty fast. Use a glass cleaner to remove dirt and dust for a sparkling clean you will appreciate.

Drapes and Blinds

These décor features are usually overlooked in the cleaning process. Most ready to hang drapes can be washed at home. Check tags and follow the instructions. If they need dry cleaning, take them down and give them a good shake to remove dust. Then decide if they look dirty or can be rehung. Use a rag to dust each slat of your blinds.

Vacuum

Vacuum every floor surface, including under the couch. If you have attachments put them to good use; vacuum the sofa and chairs, and remove the cushions to get all the crumbs that have fallen in the crevices. You can also use attachments to clean light shades and drapes.

Wash Floors

If you have hard surface floors, use a wet mop to do a once over and remove any dirt left behind after the vacuum. Just make sure you use a product that is not going to damage wood floors or laminate.

Shake-Out the Door Mat

Doormats are magnets for dirt. Shake them off, or give them a thorough vacuuming to get all the dirt and dust out of them. Be sure if you shake them out, you don’t do it on the balcony or inside your unit. You should take them downstairs and outside, so you don’t disturb your neighbours or send dust flying in your condo.

Flip Cushions

If your couch or chairs have removable cushions, always flip them when you clean. This helps keep wear and tear even and makes everything last longer.

Make it Fun

Turn on your favourite TV show, listen to music, choose an audiobook, or listen to a podcast while you clean. This makes it less tedious and allows you to multitask.

Clean Pet Areas

If you have a cat or dog, chances are they have a favourite spot in the living room where they like to chill. Give this area extra attention, vacuuming down their cushions or bed to get up pet dander, fur, and hair.

Freshen Soft Surfaces

Linen deodorizers work wonders to keep your home fresh. Use them on your furnishings as well as area rugs to help keep things odour free. Just make sure you do a test spray on a less noticeable area just in case the spray might cause discolouring.

Clean Windows

Cleaning windows, even just from the inside, can make a world of difference. They look less streaky, have less glare and let more natural light into your condo. Use a glass cleaner and a paper towel or newspaper for a streak-free sparkle.

Polish Wood Furniture

Give your wood furniture some TLC with lemon-scented wood furniture polish. Since condos can be dry, this can help avoid cracking.

Declutter

As you clean, look for opportunities to declutter. Do you need those old magazines? Is there anything you haven’t used that seems to always be in the way? The less stuff you have, the easier it is to keep your home clean.

Leverage Storage

Look for places to stash things away to keep the area tidy. For example, do you have drawers in your side tables, a desk or your coffee table with enough space for more stuff? Do you have shelves with space for some baskets to store away pet or kid toys, books, magazines, etc.? Every little thing you keep out of sight makes your living room look neater and reduces clutter.

Cool Storage Ideas

Some ideas to help reduce clutter include:

  • Buy a bike hook and hang your bike in a corner from the ceiling.
  • Take advantage of the couch and store flat boxes beneath for magazines, paperwork, devices, etc.
  • Buy coffee and side tables with drawers.
  • Look for corner shelves to optimize space for things like books.
  • Use ties to keep home entertainment wires and plugs neat and out of the way.
  • Use baskets for everything!
  • See if you can store stuff behind your curtains.
  • Invest in some hanging door storage or wall hooks if your living room is right at your entry.
  • Take advantage of every inch by choosing shelving units with less width and optimum height.

The better your storage, the more organized you stay. That makes for a much more relaxing living space. 

To learn more about how to clean your living room and our home cleaning services available, call Maid4Condos at (647) 822-0601 or contact us here.

7 Tips for Keeping Your Bedroom Spotless

Many of us focus on keeping common areas in our homes neat and tidy, but our bedroom sanctuaries tend to get a little, shall we say, messy. It’s easy to do this as we usually spend time sleeping here, so why worry about the mess? 

7 Tips for Keeping Your Bedroom Spotless

The thing is, when you let your bedroom get messy, you allow dust to build up and unthinkable things to collect in your bed. Clutter is also bad for the mind, so trying to get some sleep in a room in complete disarray, or waking up to clutter, can mess with our minds without even realizing it. 

If you are one of the many who have a closed-door bedroom policy to hide your chaos, use these seven tips to keep it spotless and serene.

1. Declutter

First, start with a clean slate. Do a complete bedroom declutter using these easy steps:

Start by looking at all the clothes that have landed on the floor, your bedroom chair, or tossed on your dresser. Either put them in the laundry, hang them up or stash them in a dresser. Anything you don’t need can go in the trash, to charity, or sold online.

Next, assess your closet and decide if there is anything you don’t wear anymore. If it’s in good condition, either give it to a friend, drop it off for charity, or sell it online. Do the same to all your dresser drawers.

Now it’s time to look at anything you don’t wear, such as magazines, books, papers, workout equipment, etc. If you use it, find a place to store it. If you don’t trash it, give it away, or sell it.

Finally, take advantage of all that new space in your closet and dresser drawers. Organize each drawer to separate things like socks, undergarments, and accessories, and stick to those drawers when putting away the laundry — yes, you will now be putting your laundry away!

You now have your room organized and can try your best to make sure everything is put away to avoid creating more clutter.

2. Pick-up laundry

Your bedroom is often a place where clothes begin to pile up mysteriously. It’s even worse if you are a fashion maven who changes several times a day. To help reduce laundry pile-ups, switch to a laundry pick up method instead:

  • Keep a laundry basket or sack in your room, and instead of dropping dirty clothes on the floor, place them in the laundry.
  • If you change, put your clothes not ready for the laundry just yet, keep a pretty basket in your room and at least fold your clothes and put them in the basket.
  • Keep a separate laundry “sack” hanging on a bedroom door knob where you can place anything that requires dry cleaning so you keep it out of sight, but can also then just take the sack with you to drop off your laundry.

When you do the laundry, be sure to hang everything up or fold it and put it away.

3. Vacuum

Vacuuming the bedroom might seem like a waste of time, but you seriously want to rid your sleeping space of dust and dust bunnies that love to hide under the bed. Use your vacuum to:

  • Vacuum the entire floor area, including under the bed, chairs, side tables, etc.
  • Remove your sheets, vacuum the mattress, and put the sheets in the laundry.
  • If you have attachments, use them to vacuum your lampshades and drapes.

If you don’t have a vacuum and have hard surface floors, use a broom, and make sure you get under the bed!

4. Dust

Dust all the surfaces in your bedroom, such as your dresser and side tables. Try to do this once a week, or at least once a month.

5. Make the bed

Not making your bed is an easy habit to get into. However, there are many reasons you should make your bed every day:

  • When you make your bed, it becomes a morning ritual that helps start your day off on the right foot.
  • When you come home after work, you reduce stress levels as your bedroom is neat and tidy, keeping the mind calm.
  • Your room always looks cleaner when your bed is made.

A made bed is always more inviting, encouraging your mind to relax and be ready for sleep.

6. Keep your bed fresh

To make your bed even more inviting, commit to keeping your bed linens clean with these tips:

  • Bed sheets should be washed once a week. If you can’t manage this, aim for twice a week, or at least once a month.
  • Your duvet cover should be washed each season, so a pretty manageable schedule, although it’s easy to forget. Consider adding an alert on your phone as a reminder.

If you don’t have a duvet cover, it can be cumbersome or close to impossible to wash your comforter. Consider using a fresh spritz of a linen deodorizer once a month to keep your room fresh, and then bring your comforter to the dry cleaners every season.

7. Get organized with storage

A common reason condo dwellers have messy bedrooms is that they lack storage space. Here are some storage ideas to help keep things neat and optimize your small space:

  • Install shelves in your closet where you can place baskets to store smaller items.
  • Use an old school clothing rack in your room to take on closet overflow.
  • Use a hanging shoe tree on the back of your bedroom door to organize shoes, or even slide in accessories like scarves.
  • Use bookshelves as a creative headboard where you can place small baskets of clothes or declutter other surfaces by placing books, magazines on shelves and in baskets.
  • Buy a laundry sack instead of using a hamper so you can hang it on a doorknob to take up less space.
  • Use the space under the bed with handy organizers to hold things like seasonal clothes, lesser worn items, bed linens, etc.
  • Buy a bed with built-in drawers.
  • Use cork tiles on the wall to create handy storage space for jewelry using sturdy push pins as hangers.
  • Use hooks on the wall (or on the inside of your bedroom or closet door) to hang clothes you plan to wear again or for your accessories like scarves.
  • Use drawer organizers to keep everything neatly in place to make things easier to find.
  • You can also think outside the box and consider less conventional items for your bedroom, such as bathroom caddies, tote bags, etc. 

For more tips to keep your bedroom spotless, call Maid4Condos for home and condo cleaning services at (647) 822-0601 or contact us here.

Common Odour Sources in Kitchens and How to Fix Them

Smells are honest. Sure, you can cover up bad smells with good ones and try to overpower the threat temporarily. But they’ll come back, they always do. In an ideal world, our homes would always smell like the Four Seasons Spa. An intoxicating aroma that can relax and energize you at the same time. Back in reality, however, that aroma is more likely to be a bountiful bouquet of foot funk and forgotten food. When the Spectre of meals past has come to haunt your kitchen yet again, reach for this brief guide against forlorn fungus and freshen your fortress!

Garbage Cans, Disposals & Recycling Bins

Starting the list is the usual suspects – the last stop of home refuse, the garbage and recycling. Sometimes what’s finished is not forgotten. Recycling can leak a bit here and there, soon enough there’s a small ecosystem in the bottom of the bin. Grease and food scraps can clog the drain or garbage disposal with absolutely vile consequences. 

Here are some go-to methods we use to neutralize the funk in garbage cans and recycling bins. It works every time. To clean the can properly, spray it, really douse it with diluted bleach and give it a few hours to do it. After that, wipe away larger particles. Rinse it with water and use soap to wash it out. 

A helpful way to stay ahead of funky build-up is to regularly spray with odour eliminating disinfecting sprays or homemade solutions with natural cleaners and essential oils. Prevention is the best measure to take here. A good garbage routine will make bin funk a problem of the past. 

If you’re the proud owner of a garbage disposal, save your citrus trimmings and rinds in the fridge. Collect enough of them and feed them in one shot. That way, there will be enough citric acid and essential oils from the citrus peels to saturate every corner. Doing so helps break up the organic grime that’s the cause of the odour. Do this a few times a month to keep everything smelling fresh.

Sponges and Rags

Our humble kitchen companions do a lot and get very little credit or attention. Sometimes we take for granted and assume the tool we use to clean other things must be clean by definition. Oh no, no, no, that’s not the case at all. [LINK] Your kitchen sponge may be 200,000 times dirtier than your toilet seat. 

Sponges and dishcloths can be home to a whole society of different bacteria. They’re often warm, wet, and in contact with food regularly. In particular, coliform bacteria in the kitchen are a biomarker of fecal contamination resulting from contact with contaminated raw meat. They are not not necessarily dangerous, just a bit gross. The real issue is – any environment that can breed coliform bacteria can also be home to some other nasty visitors.

The best solution is to bathe that sponge or dishcloth in a diluted bleach solution once a week or if you like variety, stick the sponge in a dishwasher load. If in doubt, you can always throw it out and get a new one.

Rancid Cooking Grease

Sometimes life is just a mess; it happens. Oil splatter while cooking can travel surprisingly far in the kitchen. It can quickly hide, build up, and go rancid with enough time. Grease can splatter on walls or collect for years under your range hood. The oil on your hands can build up on kitchen cabinets and commonly touched surfaces. All this build-up can make your experience in the kitchen an oily one. Remove the residue of last night’s deep-fried Tater Tot binge while watching 90 Day Finance reruns without a hassle. Certain products are well-suited to cut through the grime when they have the right active ingredients.

To master the art of grease-fighting, you must use products that dissolve the oil’s molecular structure. The absolute best products for this are either soap or a mild acid, such as acetic acid (vinegar) or citric acid (citrus fruits). Most grease build-up can be removed easily with the reliable combo of any of those products diluted with water.

Hiding in Plain Sight – Kitchen Appliances 

The major appliances found in almost every modern kitchen help us live more comfortable and more efficient lives. They offer us an abundance of benefits over what was available in the past. Sometimes we forget that these everyday wonders of technology are host to several smelly issues like standing water, mould, mildew, and collecting odours.

The humble dishwasher, friend and ally to many of us, can collect food particles inside and moisture in the rubber seal every time you open and close the door. That moisture gets trapped and becomes home to some funky fragrances. The effects build up quickly after dozens or hundreds of washer cycles. The detergent drawer is also a culprit of this. The best way to prevent this common issue is to wipe down the door seal after every use and leave the door and drawer open for a few hours after a load. 

For a reliable cleaning – Use diluted vinegar and wipe down prominent tough spots. Then run an empty dry-heat cycle to disinfect the interior – leave in any silverware baskets or holders.

After a while, a fridge becomes a terrarium, a miniature environment of all your good (and bad) food decisions. The mostly plastic interior of the refrigerator can absorb and harbour lots of unpleasant smells even if you’re diligent. Its good practice to have a regularly replaced container of baking soda sitting on a shelf to neutralize floating odours. Remove that forgotten about organic kale starting to look like seaweed, wipe-down cracks and crevices in shelving, crispers, or side door. Mop up crumbs and spills immediately, and every once in awhile – before a big grocery restock – remove everything and wipe the interior down with a disinfectant. 

Kitchen Sink Drains – The Highway to Smell

Plumbing and the internet have one thing in common – they’re both a series of tubes. One of them moves information from one point to another, and the other one shuttles…well, you get the point. Nasty smells emanating from the kitchen sink is more common than you’d think. Solid matter can build up and start to rot in the pipe. The problem can become more of one if grease is poured down the sink. It congeals and collects at bends and turns in the pipes and will start to collect food debris in its oily embrace. 

We recommend you scour the drain with baking soda and vinegar. Start boiling a kettle full of water. Meanwhile, pour a cup of baking soda and then a cup of vinegar into the sink. Make sure they really get in there. Let the solution effervesce in the sink for five to 10 minutes, then slowly pour all of the hot water from the kettle into the sink drain.

Visit www.Maid4Condos.com to build a quote, see our latest availability and book a cleaning.

The Ultimate Guide to Keeping Your Home Clean and Fresh Like a Pro

A clean home is a safe and happy home. When was the last time you cleaned, and not just the occasional pass over the kitchen counter, or a light dusting of shelves and tables? Many of us are probably guilty of this and can think of a friend or colleague who knows a thing or two about keeping their living spaces immaculate and refreshing 24/7.

How to keep your home clean and fresh?

Their secret? They don’t just clean frantically before you come over for dinner, or tire themselves out over the weekend to scrub and buff the floors. Instead, they follow the cardinal rule of home cleaning: keeping it simple and manageable every day, as they move around their homes to eat, lounge on the couch, and go to bed. Here’s how they do it:

Always Make the Bed

What’s the point of making the bed when you’re already running late in the morning after hitting snooze, and coming home to crash on it anyway? That’s a question many of us ask, but the truth is that a clean, well-made bed can do wonders for catching those much-needed zzz’s, and brightening up your bedroom. Since the bed is the focal point of bedrooms—and the most personal space—making it every day after you get up can instantly make the room cleaner.

Clean Up After Eating

Dirty dishes are the leading cause of sticky surfaces, lingering crumbs, and even pests and bugs inside your home, all because food scraps are attractive. And the more they pile up, the tougher it is to clean them and make room in the kitchen to try new recipes your friends are raving about.

Did you cook up a storm? Here’s a pro tip from professional cleaners to prevent the mess from getting out of hand: clean pots, pans, ladles, chopping boards, and other cooking ware as you go, so you only have the dishes and serving platters to worry about after dinner. Make sure to wipe down the counter and stove after use to clean up spills and crumbs and prevent them from turning into a sticky, icky mess.

Stay on Top of Laundry

Are you running out of clean clothes? Home cleaners recommend sticking to a laundry schedule to prevent dirty clothes from piling up and taking forever to finish washing. Depending on how often you cycle through clothes, you can wash them once a week, or set specific days to do one load each of whites, coloured clothing, and delicates.

Clean the Washroom

When was the last time you scrubbed the toilet or the tub and shower walls to remove grime from soap? Many of us dread cleaning the washroom because it’s tedious, and it produces a lot of waste. But what if we told you that cleaning the washroom doesn’t have to be such a chore?

Rather than waiting until the washroom is filthy, make it a habit to wipe down the sink, counter, and mirror, and rinse the walls after every shower to prevent soap gunk and grime from building up.

Clean as You Go

These days, a lot of us are lounging on the couch 24/7, and without having people over, it’s easy to forget to fluff and straighten throw pillows, or stashing away small trinkets, books, and other items littered around the room. But undoing this habit and cleaning up when you do get off the couch can do wonders in keeping your home clean and spotless.

Set a Long-Term Cleaning Checklist

Ready to tackle the bigger tasks you’ve been putting off? A busy weekend of cleaning can be overwhelming, and not everyone is up for it. To make it easier, think of it in smaller chunks.

What’s something you’ve been meaning to do to clean your home? Maybe it’s getting rid of junk in the garage, or clearing old clothes from your closet. Whatever it is, schedule one task a day or weekend to get through, so you can restore your home’s warmth and comfort one major clean at a time.

Hire Home Cleaning Services

When was the last time you truly deep cleaned your home? Many of us can follow these tips above, do some light dusting every week, and still notice some stubborn stains and grime sticking around. To complement your regular cleaning, you may want to book home cleaning services once in a while to take care of the big stuff, like stains and built-up dirt.

Professional home cleaners use a range of cleaning supplies to keep your home clean and healthy for longer, and make putting away the dishes or keeping away littered items easier as you move about.

Depending on your schedule and the size of your living space, you may opt for a weekly or monthly home cleaning to thoroughly disinfect your surroundings. To achieve this, home cleaners may add-on GermBlasters, a powerful and odourless disinfectant that can be sprayed on hard-to-reach areas and kill disease-causing germs and bacteria nesting in your home. The GermBlasters cleaning method is 100% safe across a range of surfaces, and won’t contaminate food, despite killing common food prep bacteria like E. coli, salmonella, and listeria. With GermBusters, you can trust these home cleaning services to keep your living space safe 24/7.

Do you need help in restoring your living space to its perfect warmth and comforting atmosphere? Learn how professional home cleaning services help you achieve this. Call Maid4Condos at 647-822-0601 or contact us here.

Your Complete Guide to Removing Blood on Carpets and Hardwood Floors

No one wants to deal with blood. On top of the pain from an open wound or injury, cleaning up the mess afterwards can be difficult, especially when scrubbing them off of absorbent carpets or seeping through planks of hardwood floors. Cleaning up might be the last thing on your mind, especially when these bloodstains often mean you or a loved one is hurt. By the time the chaos has calmed down, you could already be dealing with a stain that has set.

How to remove blood stains from carpets and floors?

Can blood stains be removed even after they set? While it’s not easy, it is possible with the right tools and tips, depending on the flooring type. Professional cleaners recommend removing the stain as soon as possible, but you can’t always get to it right away. The good news is that with a lot of scrubbing and homemade cleaning solutions, you can still restore your home’s floors back to how they originally were.

Here, we’ll discuss what professional cleaners do to prevent bloodstains from ruining the most common types of flooring.

How to Remove Bloodstains from Carpets

It’s never ideal to spill any type of liquid on carpeted floors, as these are very absorbent. Bloodstains, however, are some of the worst because of the foul smell that dried up blood leaves, along with the stark colour contrast of red against neutral carpets.

1. Use a steel brush

There are different ways to remove blood that’s set in carpeted floors. If the stain is dry—often the case when homeowners hire professional cleaners for a residential deep clean (and long after the injury is treated)—you can brush it away with a steel brush. This loosens the stain and removes any deposit on the surface of carpet fibres.

2. Mix dishwashing liquid

If brushing doesn’t work, try mixing a teaspoon of dishwashing liquid with two cups of cold water. Then, use a clean white cloth to blot this cleaning solution directly on the stain until it disappears.

3. Use a spray bottle

If you’re not a fan of dishwashing detergent and chemical agents, you can still remove pesky bloodstains using cold water and vacuum. That’s right; you don’t have to be a professional cleaner to know this simple, non-chemical hack for deep cleaning stained carpets.

Start with a spray bottle filled with cold water or a wet white cloth. Spray cold water or use a wet rag to apply it directly over the stain, starting from the outside and working your way in. Professional cleaners recommend this to contain the stain immediately and prevent it from bleeding further. Then, use either a wet vac or dry towel to blot the stain, followed by drying the spot using a fan. Once it dries, you can vacuum remaining dirt or bloodstain residue, and restore your carpet’s clean appearance.

4. Try an ammonia solution

Based on their experience in residential deep cleaning services, professional cleaners recommend homemade solutions before trying out chemical ones. This reduces safety hazards for you and your loved ones, and possibly even damaging to surrounding appliances and furniture.

For best results, use one tablespoon of ammonia with a half-cup of warm water. Use a sponge to apply the solution directly on the bloodstain and repeatedly blot it until it eases up and is absorbed by the sponge. Finish up by blotting the spot with a sponge dipped in cold water to wash the ammonia off the carpet fibres.

How to Remove Bloodstains from Wood

Did you know that wood is a highly absorbent material? While wood is typically sturdy, it is prone to damage from fluids and other liquids that weaken it or cause it to rot. Fluids like bloodstains can easily seep through the material and cause long-term damage.

Avoid ruining your gorgeous, expensive hardwood floors and compromising the structural integrity of your home. Get bloodstains out of hardwood flooring right away:

1. Blot the blood

The best way to clean the blood off hardwood floors and prevent staining is by doing it immediately before it seeps. Use a paper towel or dry cloth to blot the stain, but make sure to avoid rubbing, as this causes the stain to spread and seep into the wood.

Then, use baking soda; this is a tried and tested cleaning agent used by professional cleaners when deep cleaning various stains and residue. Sprinkle it on the blotted spot, and let it sit for about a minute. Use a brush dipped in white vinegar to scrub over the area, removing the bloodstain. Wait for it to dry, and see how quickly your hardwood floors are restored.

2. Use dishwashing detergent

No baking soda at home, or it doesn’t work? Professional cleaners recommend swapping it out with a detergent solution that’s half a tablespoon of dishwashing liquid mixed with a cup of cold water. Wet a rag with this solution and wipe off the bloodstain, effectively washing it away.

3. Use steel wool

The reality is that you might not get to the stain in time to prevent it from setting. Professional cleaners also use steel wool; it’s designed to eliminate stubborn and deep-set bloodstains when you miss that short window for blotting or wiping it away.

Use steel wool to lightly brush dried up bloodstains on waxed hardwood floors. Keep in mind that you should only use gentle force and a couple of passes to avoid scratches and other damage. Once the stain is gone, wipe down the area with a damp cloth to remove remaining residue, and consider re-staining or applying a new finish to restore its appearance.

One tiny caveat: steel wool isn’t advisable to use on unfinished hardwood flooring. Try the other methods, or call in professional cleaners for a residential deep clean service if they don’t work.

4. Use bleach, but with caution

Bleach is a very strong cleaner, and even professionals only use it sparingly—and when it’s safe to do so—because it can easily damage surfaces. For very stubborn bloodstains that have seeped into the grain of the wood, you can use bleach to scrub it away. However, it comes at the cost of your hardwood floor’s finish: bleach leaves a discoloured spot where the bloodstain was removed, and you will need to re-stain the wood to restore its uniform appearance.

To learn more about removing blood and other stains from delicate surfaces through our complete residential deep cleaning service, call Maid4Condos at 647-822-0601 or contact us here.

5 Easy Steps for Cleaning Your Fridge, and How to Avoid a Mess

Clean, safe to eat, delicious food starts in the fridge. A clean, working refrigerator makes all the difference in stocking up on your favourite flavours and fresh meals you want to share with family and friends. But when was the last time you cleaned your fridge, and are you doing it right?

How to clean a fridge and avoid the mess?

Whether you’re cooking up a storm for a summer event or finally getting the chance to try out exciting new recipes this quarantine season, think about where and how you store these delicious dishes and ingredients. Are they stored properly in a clean and fully functional refrigerator? It’s time to learn how to clean your fridge in no time and keep it in good condition.

How to Clean Your Fridge in 5 Easy Steps

1. Prepare cleaning supplies

You need all the right tools and supplies to deep clean your fridge, and depending on how long it’s been since it was last cleaned, you might be greeted by a smelly and grotty mess. This is especially true if spills and food items well past their best-before dates went unnoticed.

Just like in basic cleaning packages, professional cleaners recommend coming prepared with trash bags, rubber gloves, a back-up cooler for temporary food storage, a non-toxic cleaning solution, sponges and rags, and microfibre cloths. These cleaning supplies help when eliminating the expired food items and icky stains clinging on the shelves and walls.

2. Empty it and take inventory

You can’t clean the fridge without emptying it. That’s why you need a cooler to store refrigerated items, as well as ample counter space. You might think it’s easier to leave some items behind and move them around as you wipe down the shelves, but that doesn’t guarantee a thorough clean. Removing everything inside the fridge allows you to check what should go back inside once you’re done, and discard food items well past their sell-by date.

Make it easier to keep track of what goes back inside the fridge, and where. Set aside frozen items in the cooler (or keep them in the freezer until it’s time to take them out), and organize bottles, jars, produce, and leftovers on the counter according to the order they go in. Take this time to check on the leftovers and foodstuffs for signs of mould and rotting, and chuck them in the bin.

3. Scrub and wipe it down

Take your cue from the professionals in basic home cleaning packages: remove the shelves, drawers, and door inserts for washing using a sponge and dish soap. This allows you to scrub them thoroughly and remove food scraps and stains from spills. For particularly stubborn stains, you might need to soak them in soap and water to make scrubbing easier.

While they’re drying, you can scrub down the walls with a sponge, and the exterior with a microfiber cloth. These take care of stuck-on food spills and stains on surfaces without scratching the plastic or glass, as well as fingerprints and streaks on stainless steel exteriors.

4. Take care of stubborn stains

While most stains and spills go away with a quick scrub, others require more than a few passes to ease up. Professional cleaners recommend wetting your sponge or rag in hot water to make scrubbing easier and remove congealed items. These should take care of bright stains from condiments, and restore your fridge to its clean, all-white appearance.

5. Put everything back

Yay, you did it! Now that your fridge is clean, it’s time to put the shelves, drawers, and inserts back inside, followed by food items that made the cut earlier. This is also a good time to adjust shelf placement and reconfigure how your fridge is organized. You can easily access frozen items, breakfast food, condiments, produce, and leftovers according to their size and how often they’re used. Before placing them back inside, make sure that all lids and caps are tightly screwed to avoid spills and drips.

Tips for Cleaning the Fridge

Professional cleaners follow the steps above in basic cleaning packages, but knowing what cleaning products are safe to use and how to use them makes all the difference in deep cleaning your fridge:

  • Be careful with kitchen cleaners: Not all cleaning solutions were created equally and designed to be used everywhere. Some cleaners tend to be strong and good for killing common germs, but make sure to avoid contact with food. Alternatively, you can also opt for normal dishwashing liquid, instead, to avoid lingering chemical residue.
  • Don’t use bleach: Bleach and other disinfectants are harmful when they contaminate food stored inside the fridge. To avoid this, make sure that your cleaning product is specially formulated for use inside the fridge.
  • Try natural products: Instead of potentially toxic chemicals in cleaners, opt for a natural clean. Regular baking soda can easily remove stains and absorb bad odours, while white vinegar is good for stainless steel exteriors.

Avoid a Mess in the Fridge

You can’t scrub the interior of your fridge and take out all the food and compartments every day, so the best way to keep it clean for longer is to avoid making a mess in the first place. Make sure to clean up right away if you accidentally knock over a jar or container when reaching between packed shelves. This avoids further spilling, staining, and foul odours, so you can finish your regular deep cleaning faster.

Keeping a fridge clean also means your food stays well ahead of its best-before date. In any case, you should regularly dispose of expired food items. If you don’t, these condiments and leftovers can grow mould and contaminate fresh food in close contact.

Similarly, be conscious when out for your regular grocery trip and meal prep sessions; avoid buying and cooking too much food that you can’t consume before it goes bad. Make sure to store raw meat and fish in sealed containers in the freezer, produce in refrigerator drawers, and jar items on the fridge door shelves to avoid drips and temperature changes.

Need help with cleaning your fridge? Learn more about our basic cleaning packages that include the kitchen. Call Maid4Condos at 647-822-0601 or contact us here.